You may have been doing a specific task manually for years without knowing that you can save time by automating it. Here is a glimpse of what you can do with AutoHotkey. You may know the auto correct feature in Microsoft Word. However, AutoHotKey extends auto correct functionality to all Windows applications. You can assign a hotkey to enter special characters that are not available on the standard keyboard. You can create timers, create your own start menu, built recipe book, count calories, and so on. Actually, compiling a list of what you can do with AutoHotkey is virtually impossible because you can do almost anything. To start with, you can use numerous AutoHotkey scripts built and shared by AutoHotkey users. However, you can unleash the true power of AutoHotkey by customizing or creating your own scripts; it’s easy.
How to Install AutoHotkey
You can Download AutoHotkey from the official AutoHotkey website. The download website will give you two options: Installer and Other versions. Choose the Installer option if you are a beginner. Advanced users can choose another version. After the download completes, run the installer. Installing the program is a matter of few clicks. You can choose Express Installation or Custom Installation. In both cases, the installer will guide to through the easy installation process.
How to Use Existing AutoHotkey Scripts
You don’t need to write a single line of code to start with AutoHotkey. Search the web for existing scripts that AutoHotkey users have created and shared. The easiest way to launch a script is to extract the file with .ahk extension and double-click it.
Note: you can use existing AutoHotkey scripts without installing AutoHotkey. Use a compiled version that comes as an executable file with .exe extension. However, you cannot customize the scripts in the .exe file, thus missing the true power of AutoHotkey. If you do not intend to customize the script, you can use the .exe file without installing AutoHotkey.
How to Make Your Own AutoHotkey Scripts
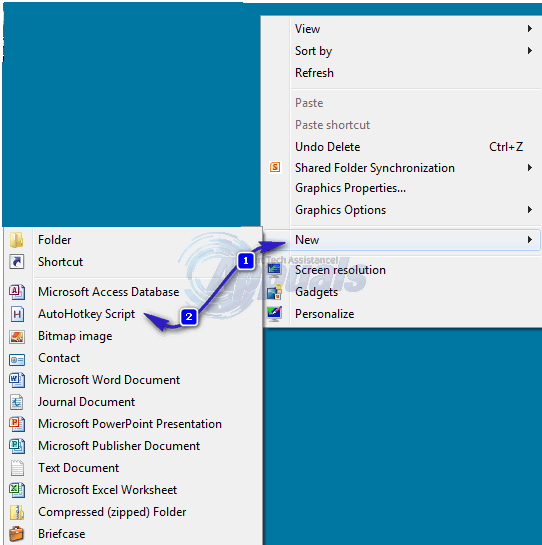
Just to give you an idea, let us make some example scripts. Before we can look into the code, let’s create a new AutoHotkey script file. Right-click on any area of your desktop or folder. Point to New, and select AutoHotkey Script. AutoHotKey must have been installed for the AutoHotKey selection to appear.
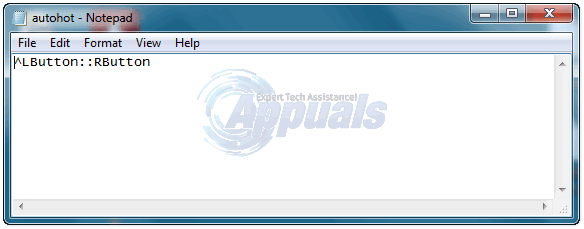
After creating the file, you need to open it in the editor to enter some code. Double clicking the file will execute it. To edit, right-click the file and choose Edit. AutoHotKey script file is a simple text file, and it will open in Windows Notepad.
However, you can Notepad++ for a cool editing experience. You will see some preexisting lines of code and can leave it there. The starting lines beginning with a semicolon are just comments. You can also add comments when you write code so that you can remember what you wrote, in case you need to re-edit the script.
Autocorrect
Let us see how to create an autocorrect entry. Look at the following code. The first line of this code simply converts “wam” to “Why always me?” Note the double colon between wam and Why. These colons tell the AutoHotkey to convert the text on the left sides of the colons to the text on the right side of the colons. The second line of code converts resume to the more appealing résumé. ::resume:: résumé
Mapping Keyboard Keys
Look at the following lines of code. This simple code swaps control and alt keys. You can assign any key to another letter. You can even map your whole keyboard according to your preferences. LAlt::Ctrl
Opening Your Favorite Website
Here is the code to open your favorite website directly with a shortcut key. The “#” key in AutoHotkey script represents the Win key on the keyboard. So, when you press the Win+Spacebar, it will open appuals.com in your default web browser. Tip: If you have created AutoHotkey scripts and want to take them with you, use Convert .ahk to .exe utility (included with the AutoHotkey installation). Furthermore, if you want your scripts to start automatically, place a shortcut of your scripts in the startup folder. To open your startup folder, open the Run dialogue box by pressing Win+R, and type the following. Press Enter and your startup folder will open. You can place any file or shortcut in this folder so that it starts automatically when the Windows starts.
How to use Linux scripts to Tidy up Your Desktop in Windows 10How to Use the xmessage App Inside of Shell ScriptsFix: Execution of scripts is disabled on this systemHow to Fix ‘Running Scripts is Disabled on this System’ Error on Powershell?