Disabling a laptop’s touchpad is comfortably within the realm of possibilities, even on Windows 10 – the latest and greatest iteration of the Windows Operating Ssytem. Before you move on to turning the touchpad on your Windows 10 laptop off, you should definitely have an alternative input device for your mouse pointer connected. If you only want to have your computer’s touchpad turned off while you have a mouse connected to it, you’d be better off following disable touchpad. If you want to permanently turn your touchpad off, however, you are most certainly in the right place. There are a number of different ways you can go about disabling touchpads on Windows 10, and which one you use simply depends on your specific circumstances or basically whichever way ends up getting the job done for you. Without further ado, the following are some of the absolute most effective methods you can use to disable a touchpad on Windows 10:
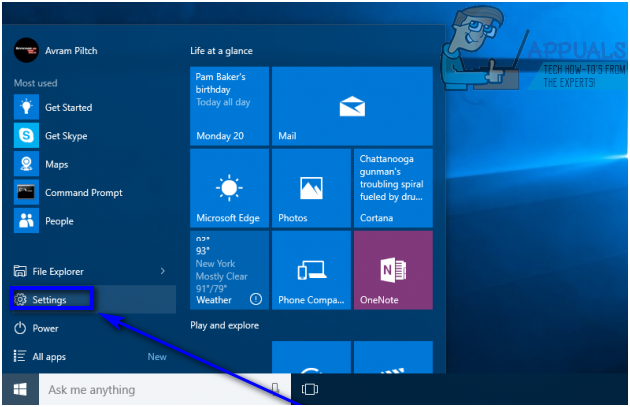
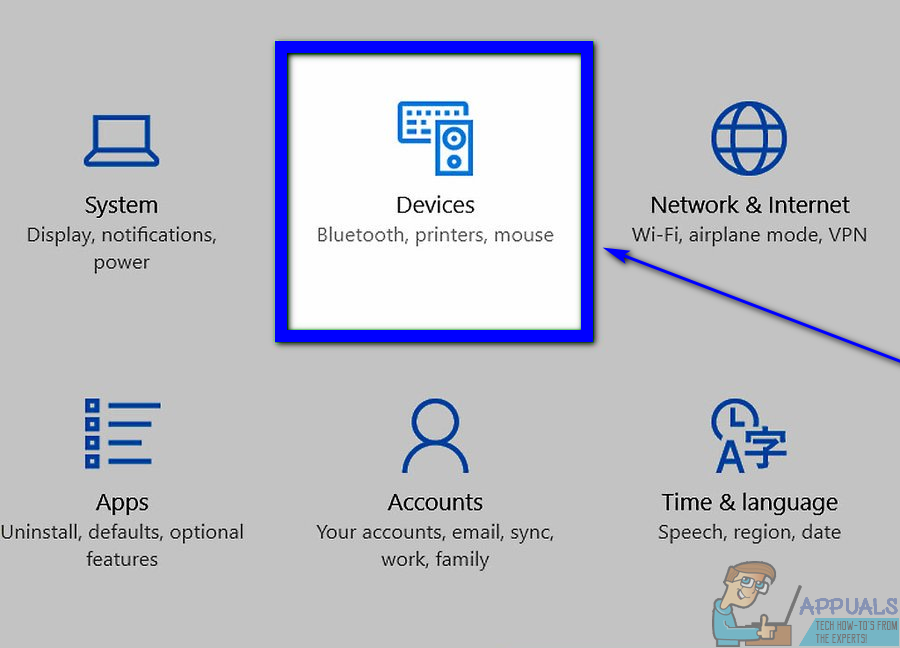
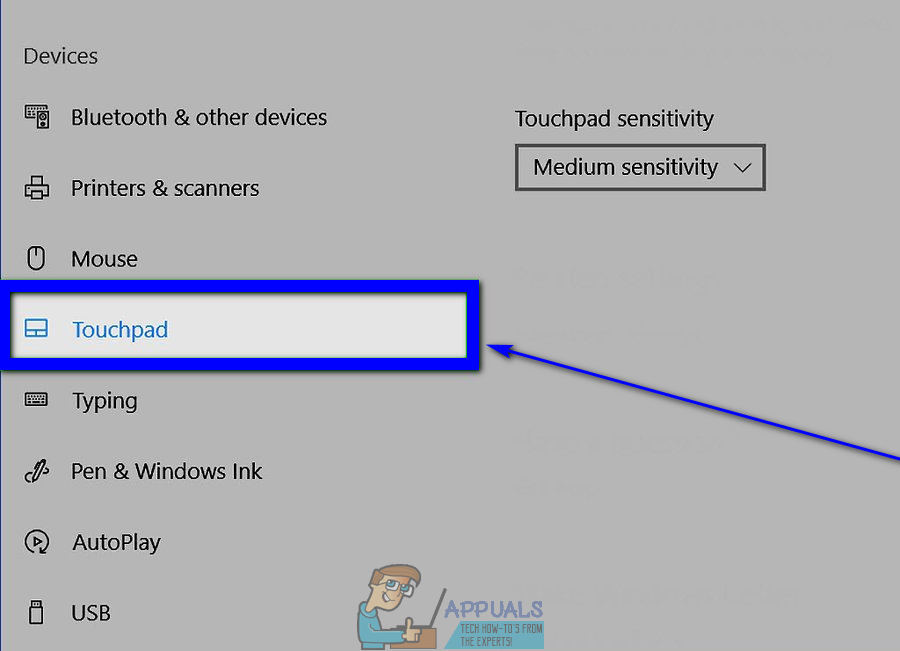
Method 1: Disable the touchpad in Settings
Windows 10 brought with it the ability to turn your laptop’s touchpad on or off directly from the Operating System’s Settings utility. If you would like to disable your touchpad from Settings, all you need to do is:
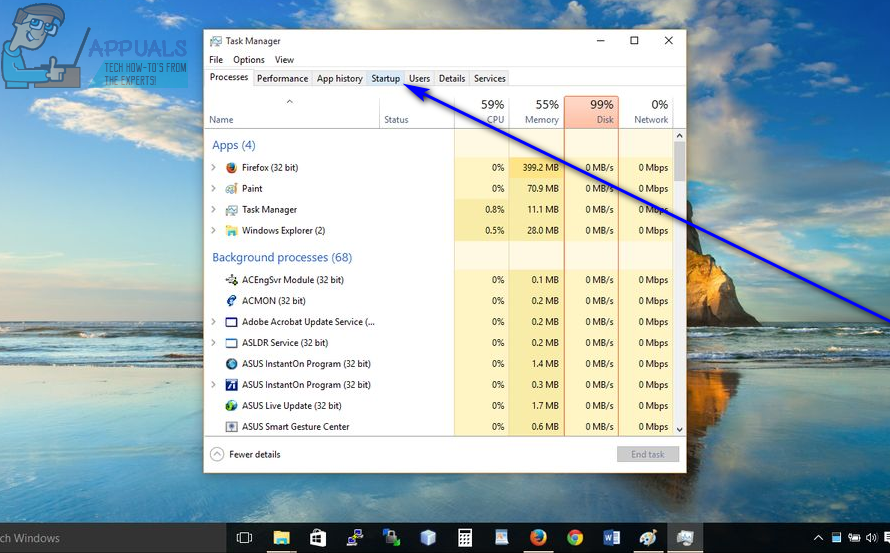
Method 2: Disable ETD Control Center from running at startup
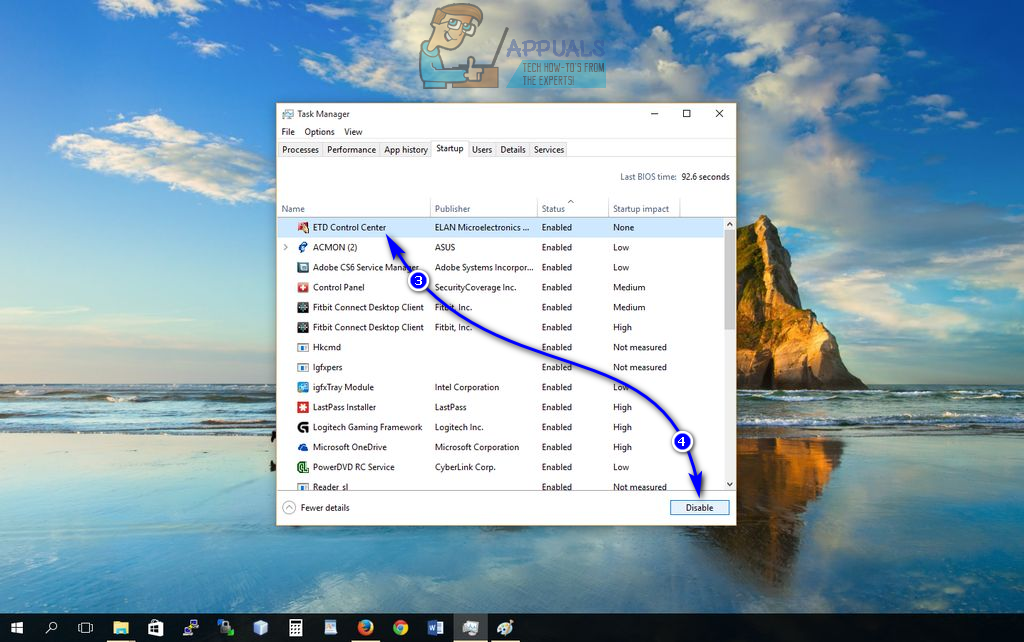
For many laptops, the touchpad is controlled by a program known as ETD Control Center, a program that starts up every single time your computer boots up, and it is when this program is running in the background that your touchpad works. That being the case, users who do have ETD Control Center on their computers can disable their touchpads by simply preventing the program from running at startup. Users who don’t have ETD Control Center on their computers, however, would be better off giving any of the other methods listed and described here a shot. To use this method, you need to: Once you do so, ETD Control Center will no longer run when your computer boots up, which means that your touchpad won’t work either.
Method 3: Disable your touchpad in Device Manager
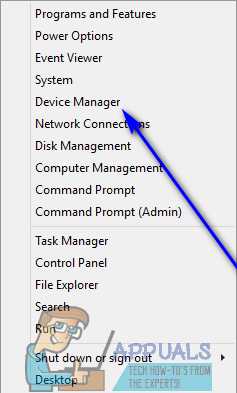
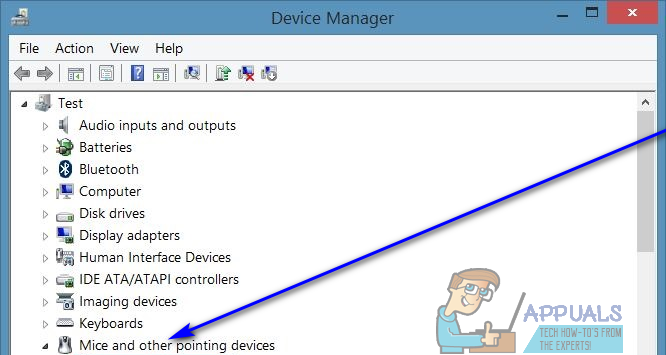
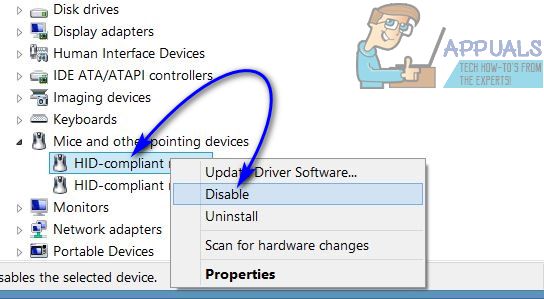
Every device connected to a computer has a listing in the Device Manager, and it is in the Device Manager that you can disable devices that are connected to your computer, preventing them from working. The same can be done in this case to disable your laptop’s touchpad. To disable your touchpad in Device Manager, you need to:
Method 4: Use Touchpad Blocker to disable your touchpad
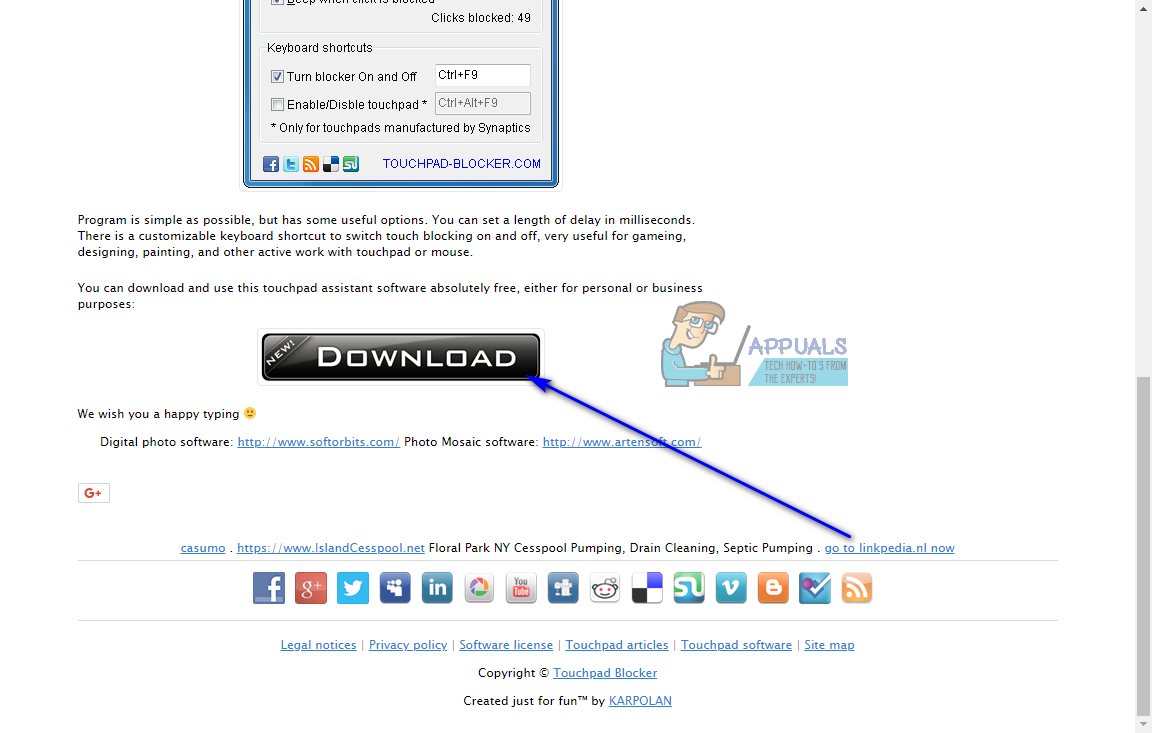
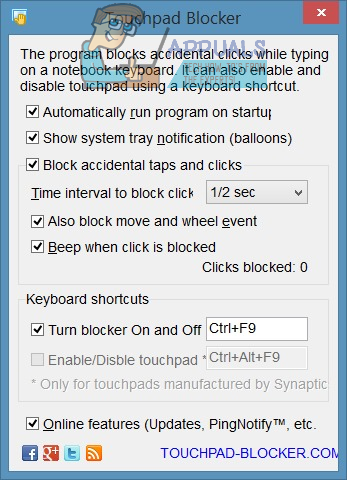
If absolutely none of the methods listed and described above have worked for you, have no fear – you can still use a third-party application to disable your touchpad. One such application that you can use goes by the name of Touchpad Blocker. Touchpad Blocker is a free, lightweight piece of software that can be configured to run at startup and allows users to turn their touchpad off by simply pressing a specified key combination on their keyboard (with the only catch being the fact that the program needs to be running – in the background or in the foreground, doesn’t really matter which – for it to be able to do so). When you turn your touchpad off using Touchpad Blocker, the touchpad remains disabled until you either turn it on by pressing the specified key combination again or restart your computer. If you would like to acquire and use Touchpad Blocker, you need to: Touchpad Blocker is a completely lightweight and non-intrusive application – it runs in the background (can be accessed from the Notification Area, though), so you won’t even know it’s there.
Fix: Windows 10 Update Removes Asus Touchpad DriverFix: Cannot install Synaptics Touchpad Driver on Windows 10Touchpad not Working after Windows 11 Update? Try these fixesFix: Turn windows features on and off is blank or empty in Windows 11
