When you are facing any issue regarding your network and are unable to connect to the internet, the system seems pretty much useless as almost everything is now synced to the internet. There are several different methods that you can use to troubleshoot your network, such as flushing your DNS settings, resetting winsock. While these solutions sometimes bear fruits, it may not always be reliable and doesn’t always work. Regardless, whatever the case may be, if you are unable to fix your network issues, an available option is to simply reset the network. Performing a network is not always advisable. This is because of the fact that when you do so, it completely removes any changes that you might have made to your network. Simply put – it completely wipes your network configuration. Therefore, it is first recommended to try out other available methods before residing in this. A must-do before resetting your network would be to try and run the Windows Network Troubleshooter to see if that actually resolves any issue that you are facing. While that does not always work out, it does identify and solve common connectivity issues that you might be facing.
Running Windows Network Troubleshooter
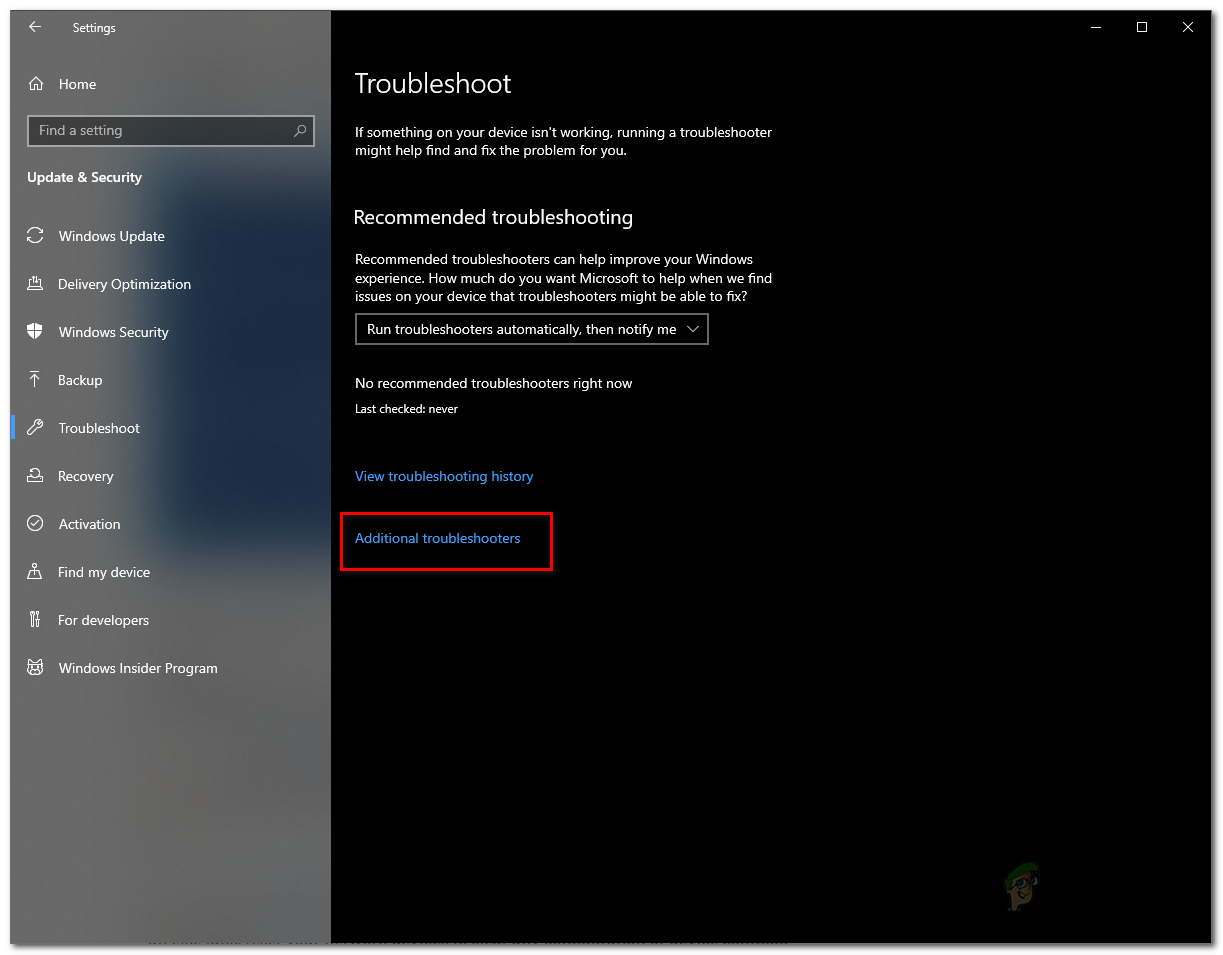
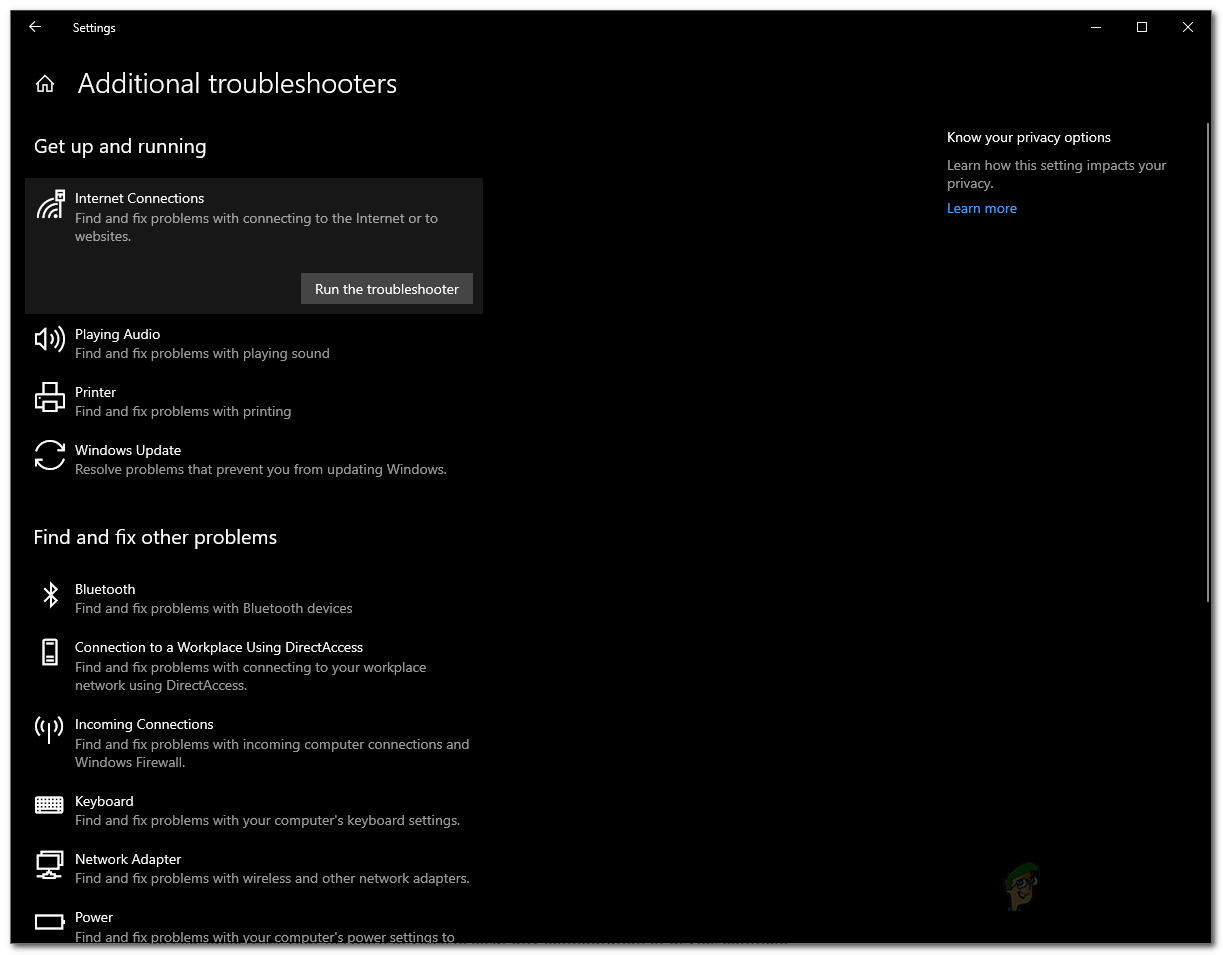
The network troubleshooter should be the first thing that you do when you stumble upon a connectivity issue. While this built-in troubleshooter isn’t going to solve every issue, it does resolve the common problems that arise and thus saving you from all the trouble. To run the Windows Network Troubleshooter, follow the instructions down below:
Resetting Windows Network Settings
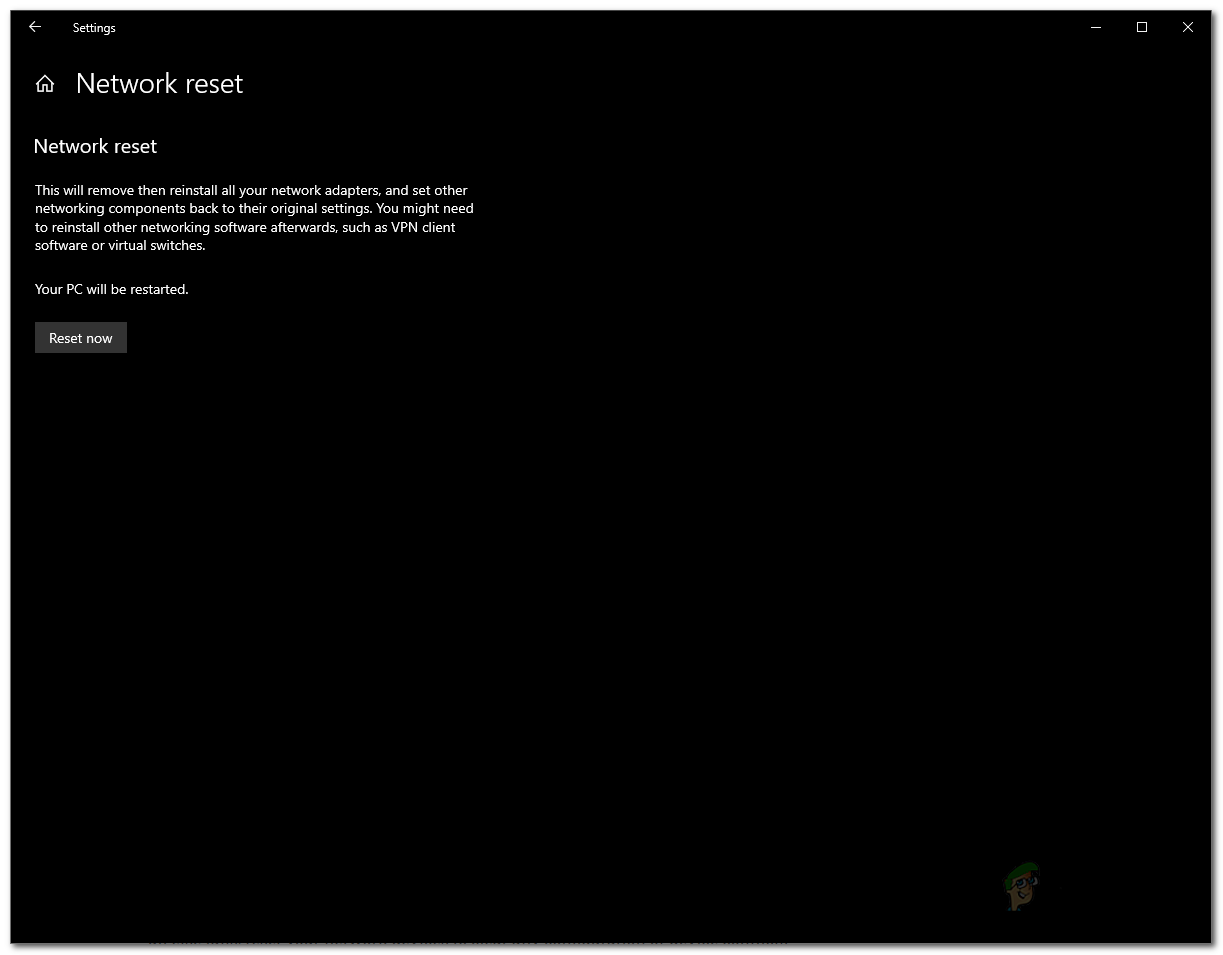
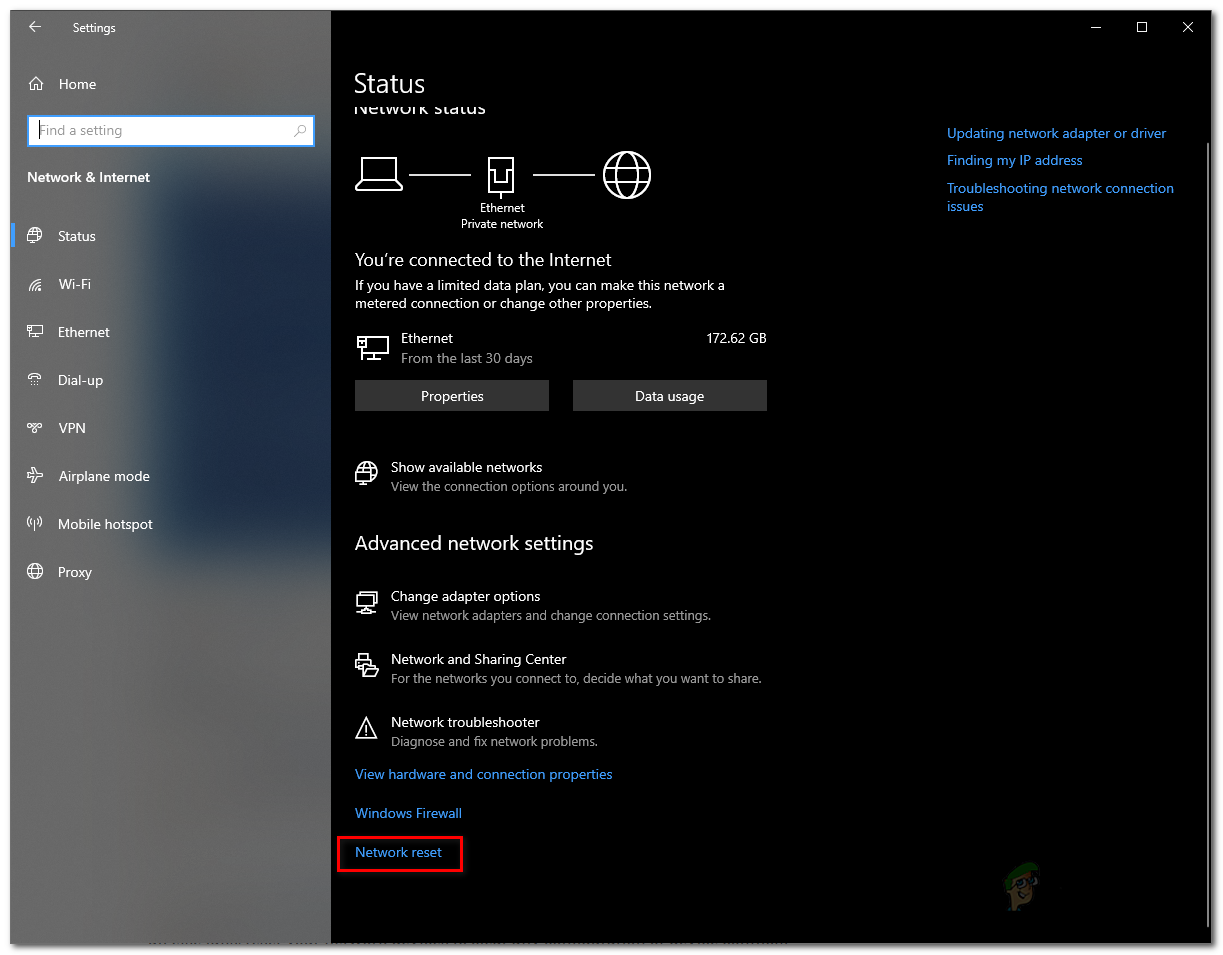
If all fails while trying to resolve any network problems, resetting your network settings is the way to go. When you reset your network settings, Windows will basically forget your Ethernet network, any proxy or VPN connections that you have set up along with everything else. Along with this, all of the network adapters will be removed and then installed again so if you have any third-party VPN or proxy service set up, their adapters will be removed. Thus, after resetting your network settings, you will have to install those services again to get them to work as intended. Considering that it does all of this, resetting the network should be hard, right? On the contrary. It is essentially just a few clicks that will do all of this for you – pretty easy. Actually, there are different ways that you can do this. First of all, is to simply do it via the Windows Settings window. Secondly, you can also do this via a command prompt window actually by entering a simple command. We will be covering both of them. To reset your network settings through the Windows Settings menu, follow the instructions down below:
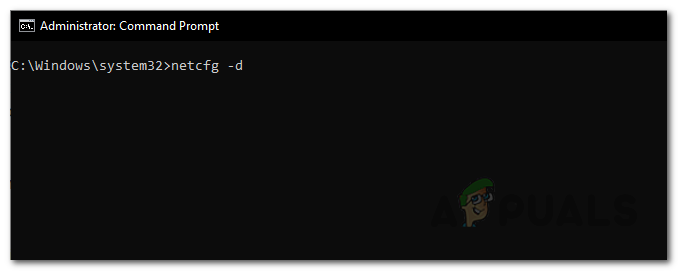
Using Command Prompt
As we mentioned earlier, another way of resetting Windows network settings is through the command prompt. This can be done through the netcfg, short for network configuration, utility. There are a whole lot of different things that you can do with the help of this utility, but for today, we’ll just be resetting the network settings. To do this, follow the instructions down below: Do not forget to install any third-party VPN or proxy services that you had before as they won’t work after the reset. This is because their respective network adapters have been removed by the reset. Therefore, install them again to get them to work normally.
SOLVED: Mouse Settings Reset by itself on Windows 10How to Reset Local Group Policy Settings to Defaults in Windows 10BEST GUIDE: Reset the Samsung Galaxy Note 4 (N910) to Factory SettingsHow to Reset your Samsung TV to its Factory Default Settings?