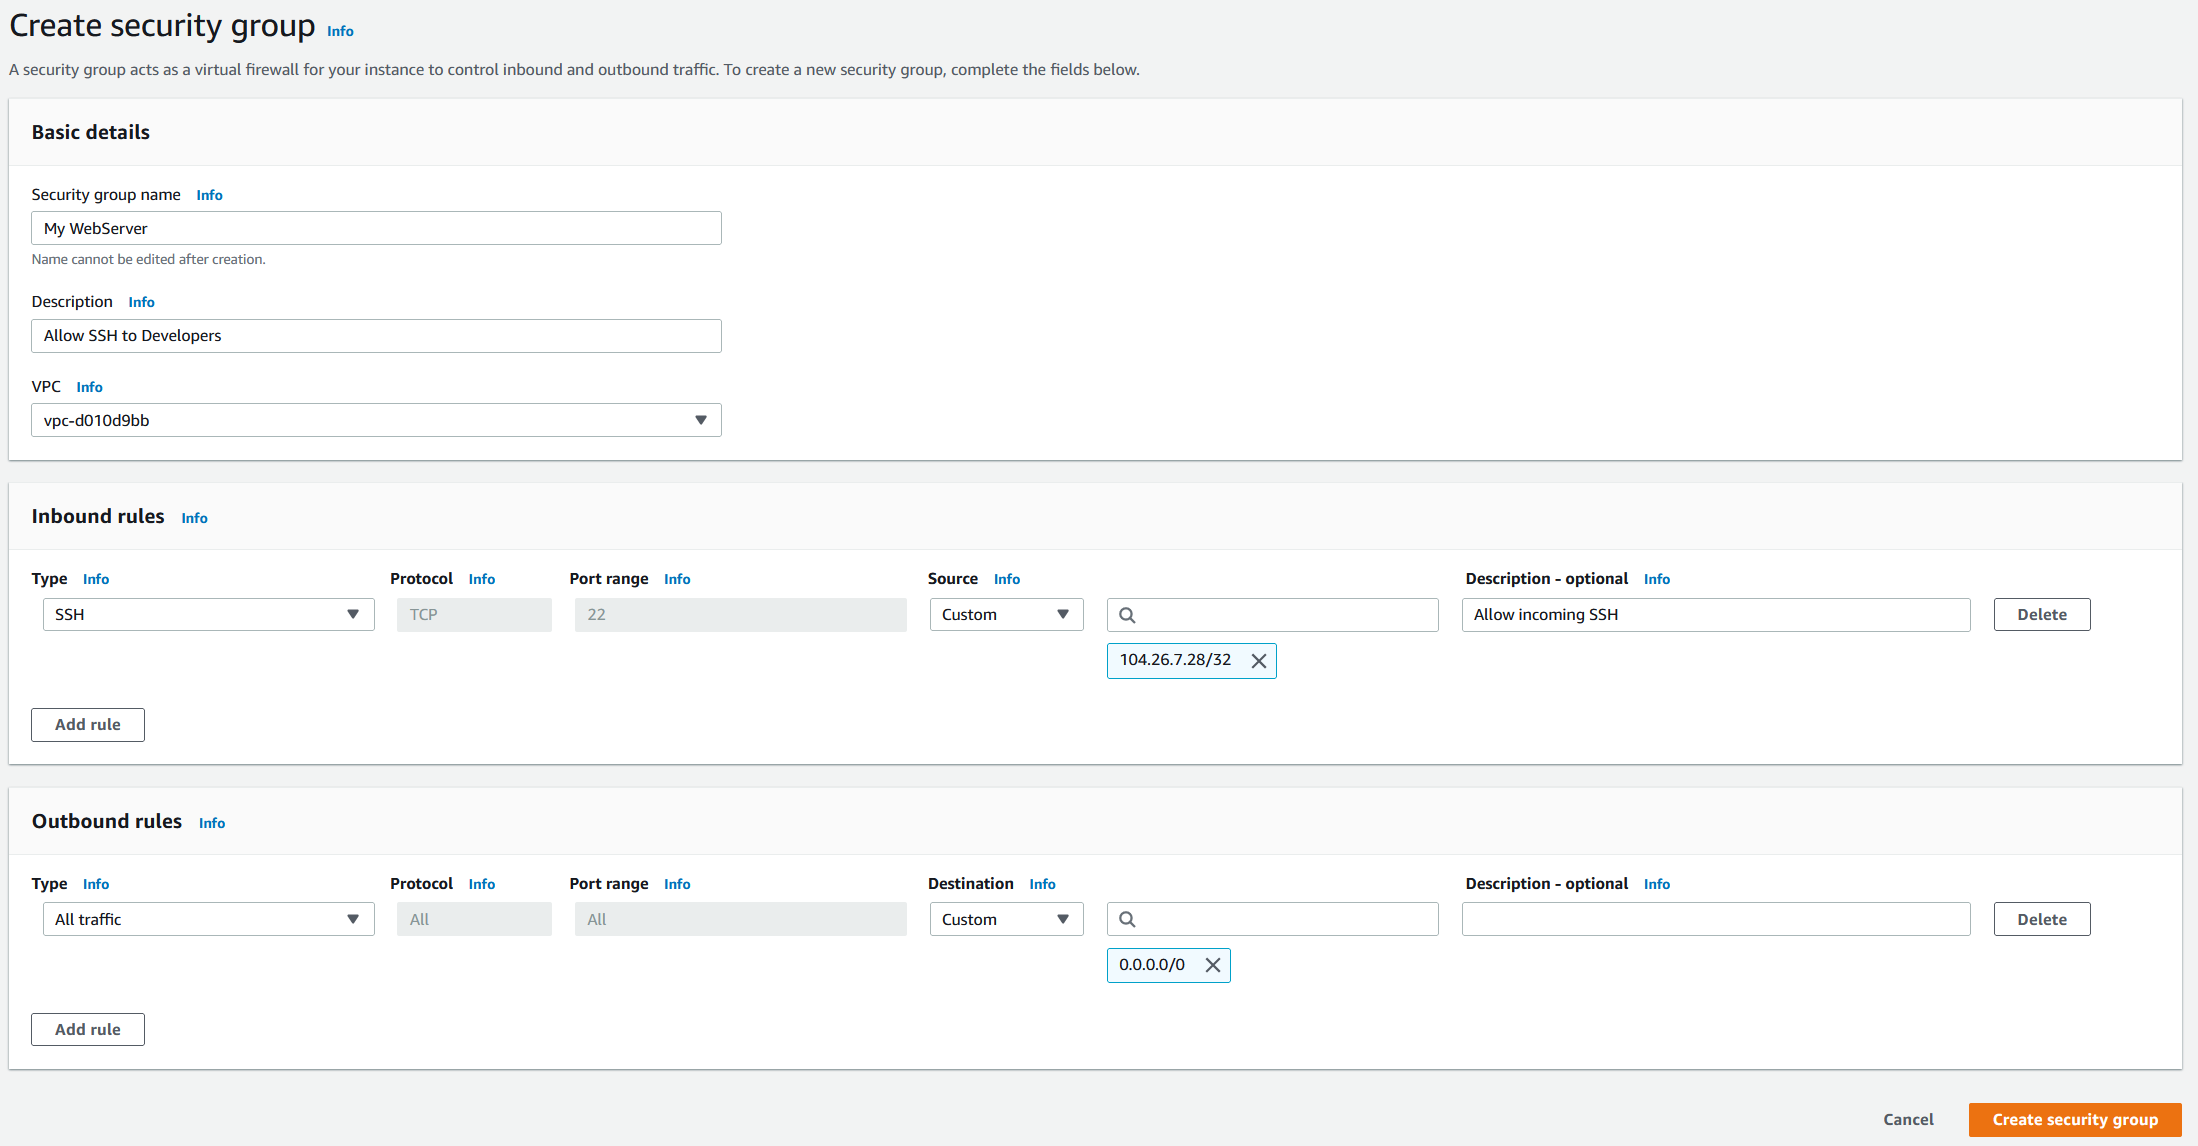
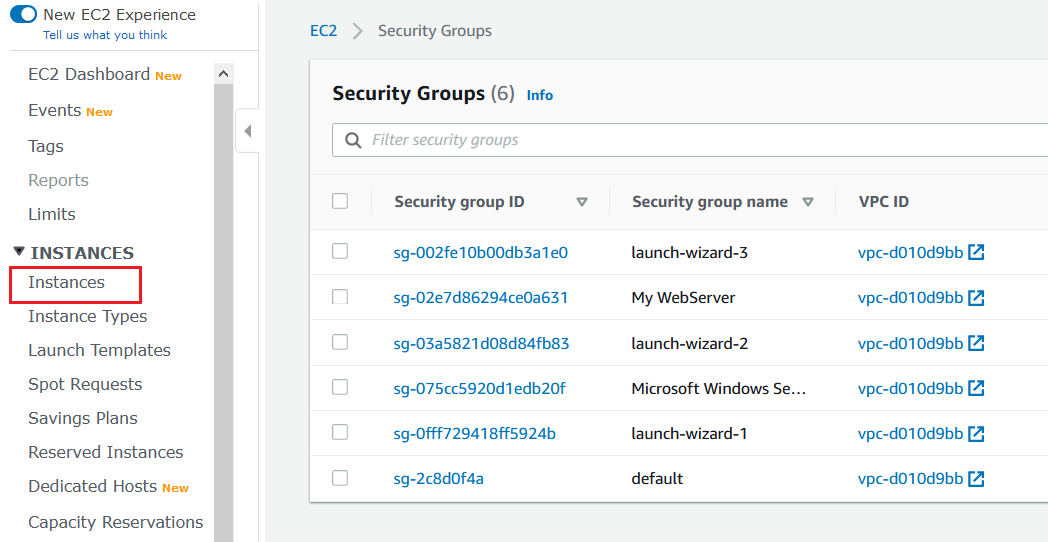
Part I: Create a new security group
At first, we will create a new security group that will allow developers to access SSH on the EC2 instance. SSH (Secure Shell) is a protocol to make a secure remote command-line connection. By default, SSH uses TCP communication.
Security group name – Name for the security group. The name can’t be edited after the security group is created. In our case, it is My Webserver.Description – A description to help you identify the security group. In our case, it is Allow SSH to Developers.VPC – The VPC in which to create the security group. In our case, we use the existing VPC.
Under Inbound rules click on Add rule and then enable SSH by following the procedure below. You can choose another protocol based on your needs.
Type – a type of protocol. In our case it SSH.Protocol – it will use TCP protocol by default.Port range – once you select SSH as the type of the rule, it will automatically assign 22 as the default port.Source – specify a single IP address or an IP address range. In our case, we will only allow access to a certain public IP address.Description – A description of a security group rule.
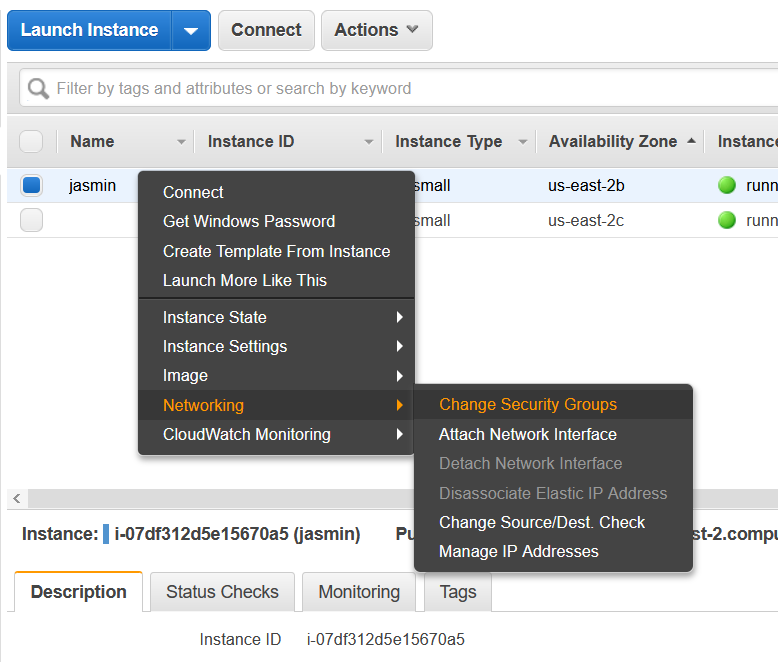
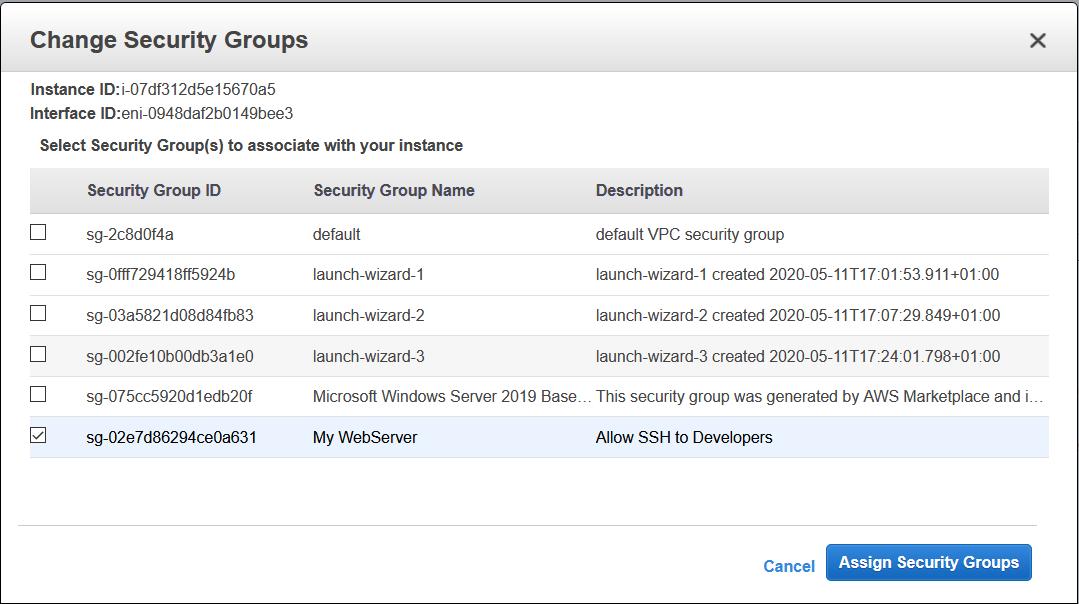
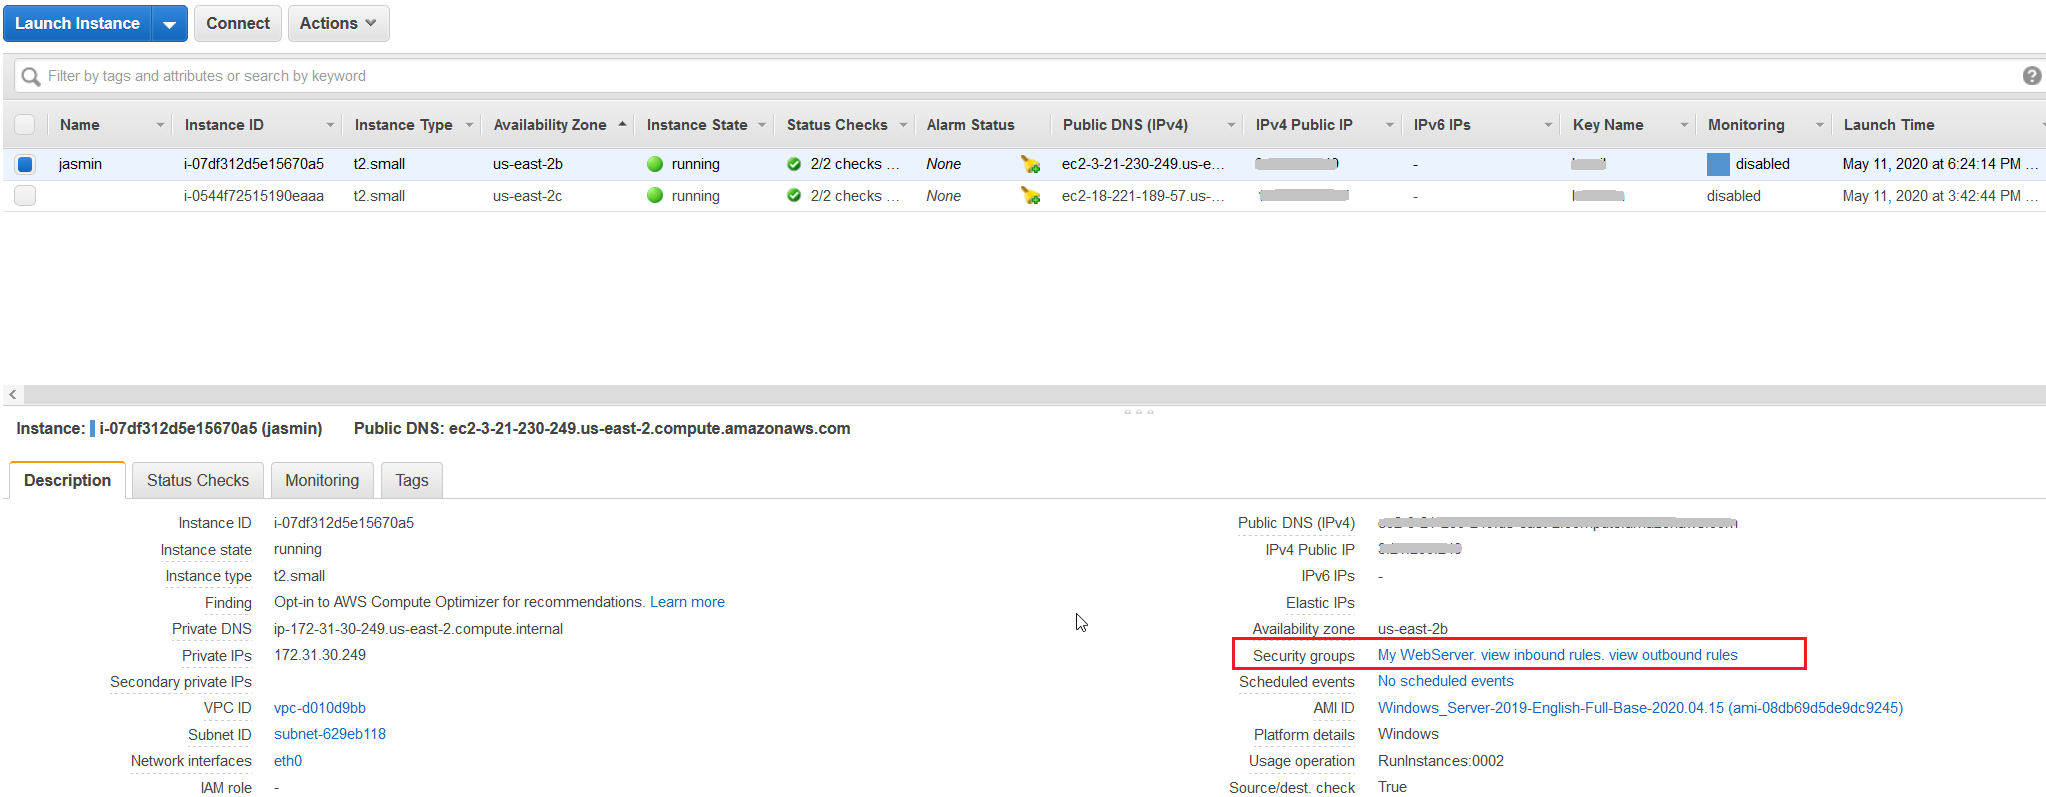
Part II: Move EC2 to the newly created security group: My WebServer
In the second part, we will move EC2 instance to the security group we created in part I.