You could take the easy way out by buying ringtones from the iOS App Store. But it is much nicer and more satisfying if you make your own – and it is not that difficult.
Create iPhone Ringtones In Four Easy Steps
That’s right, only four steps. Here we go.
Choose Your Sound
First you need the sound you want to use. Some people use songs. Others use TV show or movie soundtracks. Others use special effects. So decide what you want to use and get it on your computer. You can download audio from YouTube or any other video platform. Or you may have an existing MP3 file you wish to use. For this article, I decided to make a ringtone from the iconic Batman series of the 1960’s. I downloaded the audio using YouTube To MP3 Converter.
Edit Using Audacity
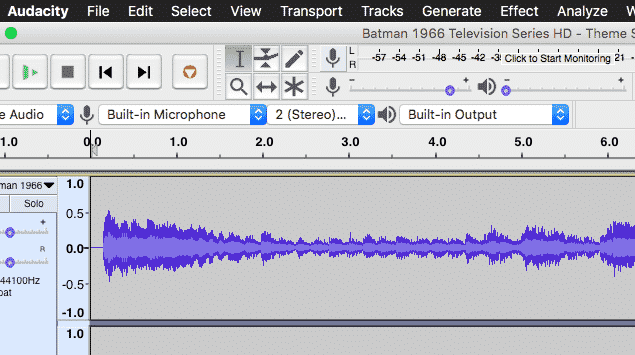
Now that you have your file, it’s time to edit it. The existing Batman audio that I have downloaded is one minute and twenty three seconds long. An iPhone ringtone is only thirty seconds in length – and then it starts again from the beginning. So you need to do some editing. That’s where the free and open-source Audacity is needed. You can load the MP3 file into it, cut off the part you need and create a brand new file.
Make Your File In Audacity
Download and install the free Audacity (or alternatively the portable version if you’re using the Windows OS). Then upload the MP3 version of your audio.
Now you have to decide what thirty second segment you want to have. The beginning of the audio may not necessarily be the best part. Using my Batman audio, the best part is when the song really kicks in at “batman….batman….“. Before that, it’s just boom, whack, kaboom…..I don’t need that in a ringtone. So listen to your file in Audacity and clip the thirty second part you want by dragging with your mouse or trackpad. It’s best to make it 28 or 29 seconds, to ensure that your clip works without any problems. Then save it as a new file by going to File–>Save Other–>Export Selected Audio.
Audacity will ask you to point it towards the Lame file, which is necessary for generating new MP3 files. If you don’t have one, or yours doesn’t work for some reason, it will give you a download link for a new one.
Convert To iOS Format
Now that you have your trimmed MP3 file of under 30 seconds, it is now time to convert it to iOS format. You can’t simply upload the MP3 file and call it done. If you upload a MP3, your iOS device will assume it belongs in your music section and leave it there. To get it into your ringtones section, you need to convert the MP3 file to M4R format.
Open iTunes
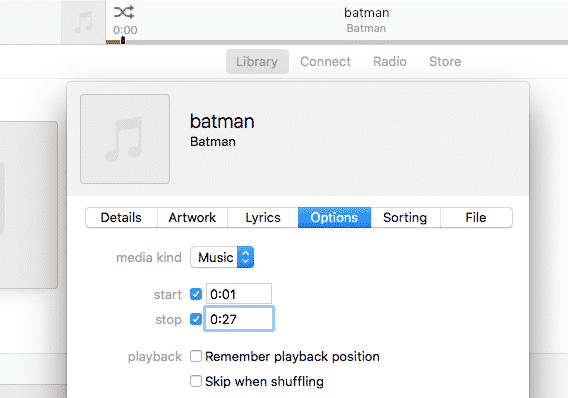
Fire up iTunes and make sure it is updated to the newest version. Then import your edited audio file to it. Then right-click on the music file and choose Song Info–>Options.
Under “Start”, put 0.01 and for “Stop”, enter the second before the file stops. Since my file is 28 seconds long, I put the end as 27 seconds. Now save it.
Make An AAC Version Of The File
To get to M4R, you first have to make an AAC version, which has the file format M4A. This is the format that Apple delivers all iTunes Store purchases in. Once you have done the previous step, highlight the song and the next part depends on what operating system you are using. If you are on Windows, right-click and choose “Convert To AAC Version“. If you are on a Mac, go to File–>Convert–>Create AAC Version.
A second file of the same name will now appear in iTunes. The new one will be a couple of seconds less than the other one, due to the cropping you did.
Drag the AAC file to another location on your computer (the desktop is always good). Then delete both audio files from iTunes. But keep iTunes open – you’ll need it again in a minute.
Change The File To M4R
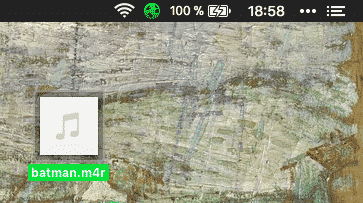
OK, we’re almost there. To change the file to M4R, it is simply a case of going to the file on the desktop and renaming it M4R.
Upload To Your iPhone
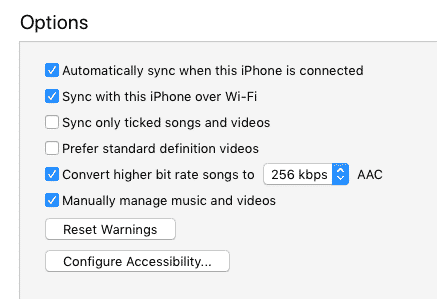
That’s the file now finished. To get it onto your iPhone, attach your phone to your computer using a lightning-to-USB cable. When iTunes detects the phone, choose “Manually Manage Music & Videos“.
Now drag the M4R file onto the “On My Device” tab.
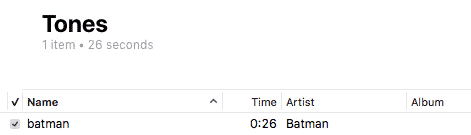
To check if the ringtone is there, click on the “Tones” tab and the audio file should now be there.
Now simply sync iTunes with your phone, and the ringtone will appear under “Sounds & Haptics” on your phone (in the ringtone section). Tap on it to choose it as your default ringtone.
Conclusion
It sounds as if you have a huge number of hoops to jump through, but in reality this is really easy. Once you get started, it is a very fast process, and soon you will have ringtones that reflect your true personality. Δ Contact Us :- trendblog.guest@gmail.com