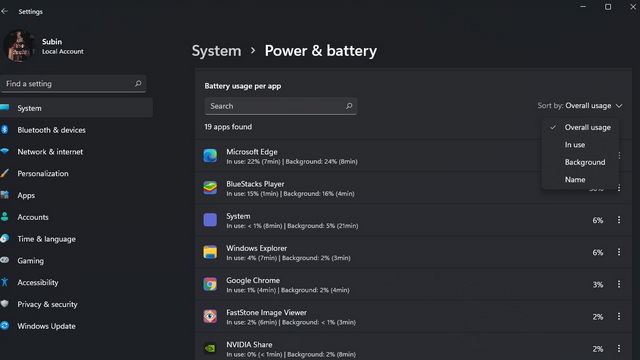
In addition to this screen time data, Windows 11 also displays the battery usage of all the apps. If an app drains your battery by running in the background, force-close that application immediately. If it is an unwanted application, uninstall the app from your Windows 11 PC to save battery life. Before moving further, if you haven’t updated your PC, update the PC from Windows 10 to Windows 11.
How to Check Screen on Time in Windows 11
As the screen on time plays a vital role in battery life, you need to check it frequently to find out how much longer you have used the Windows laptop in a single day.
- On your Windows 11 laptop, click the Start Menu and tap on the Settings icon.
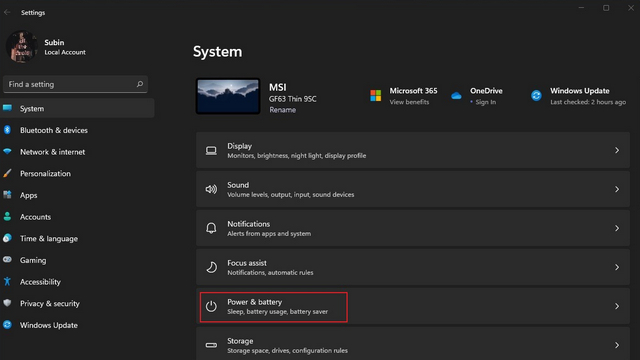
- On the Settings page, click the System tab on the left-side menu panel.
- Scroll down to choose the Power and Battery option.
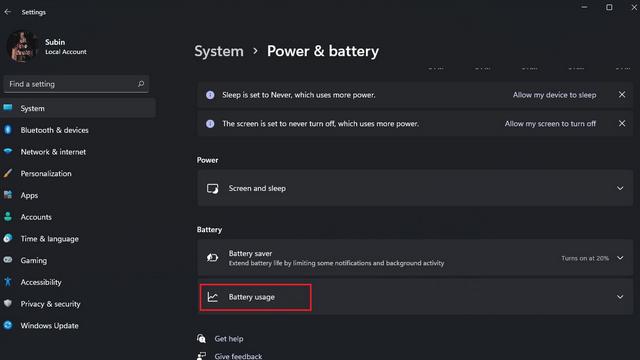
- Tap the drop-down icon next to the Battery Usage section.
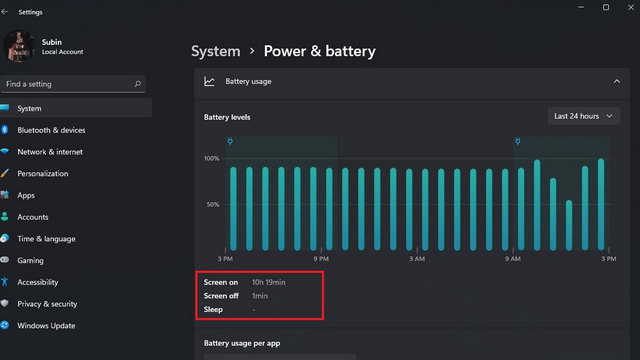
- Now, tap the Battery Usage option, and you will get the screen on time, screen off time, and sleep data.
- You can find the last 24 hours of battery usage of the PC. By default, it will display the data for the last 24 hours. To change it, tap the drop-down icon next to the Battery level option and set the duration to view the screen on time data.
How to Check Battery Usage Per App in Windows 11
On Windows 11, you can also check battery usage per app to find out which app consumes more battery life.
- Go to Settings and open the System settings.
- Select the Power and Battery menu.
- Under the Battery Usage section, you can find the battery usage of each app for the last 24 hours.
- To find the battery usage of the specific app, enter its name in the search bar and view the battery usage information.
