Today we’ll show you how to add the SwiftKey Keyboard to your Android or iOS device and choose it as your default keyboard.
Add The SwiftKey Keyboard To Your Android Device
To add the SwiftKey Keyboard to your Android device, install the app and then open it.
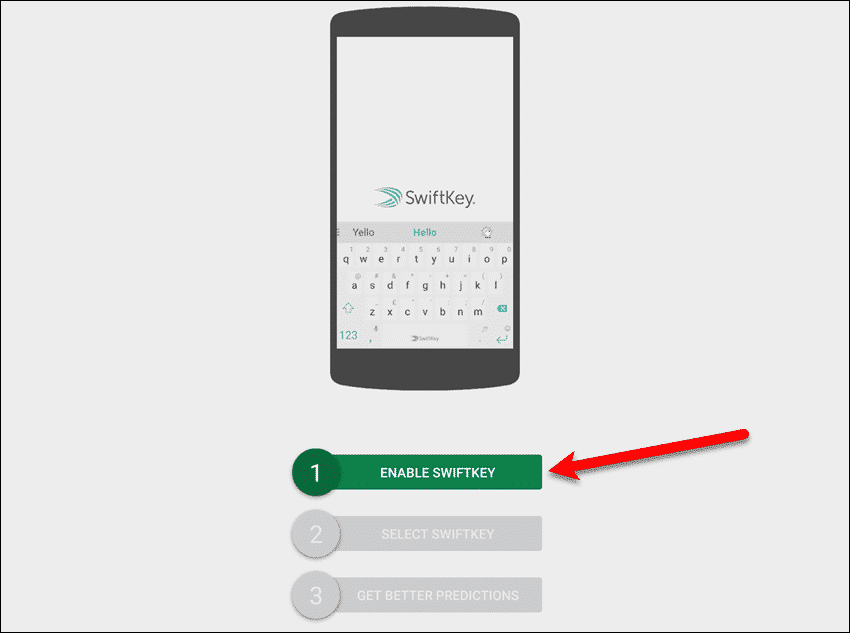
Enable SwiftKey
Once the app is installed and opened, tap “Enable SwiftKey“. We used a Google Pixel C tablet in our example, which runs the “stock” version of Android. The specific steps may be slightly different on your Android device, but the overall procedure should be similar.
On the “Available virtual keyboard” screen, find “SwiftKey Keyboard” and tap the slider button to enable it.
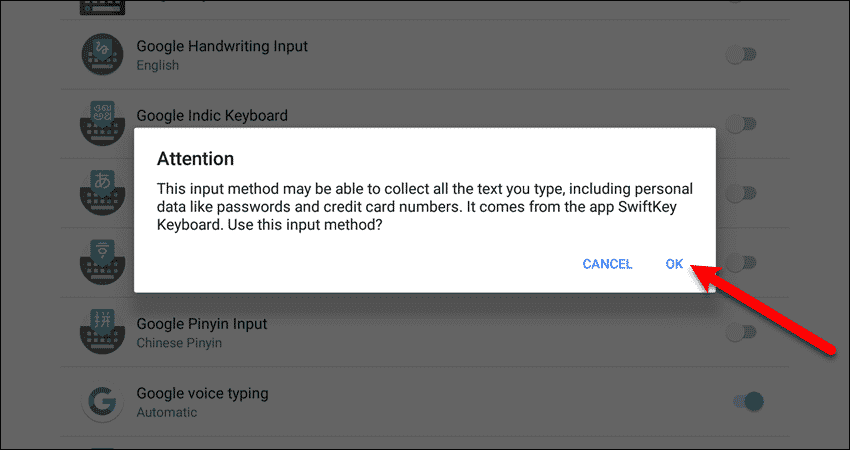
The “Attention” dialog box displays telling you that this input method could collect personal data. Any third-party keyboard app collects data as you type so it can learn your writing style and become better at suggesting words as you type. SwiftKey takes security seriously and use incredibly strict data security policies. They follow European user data laws, which are stricter than those in the United States. Tap “OK” to continue.
The slider button for the “SwiftKey Keyboard” option turns blue. Tap the “Back” button on your device to return to the SwiftKey app.
Select the SwiftKey Keyboard
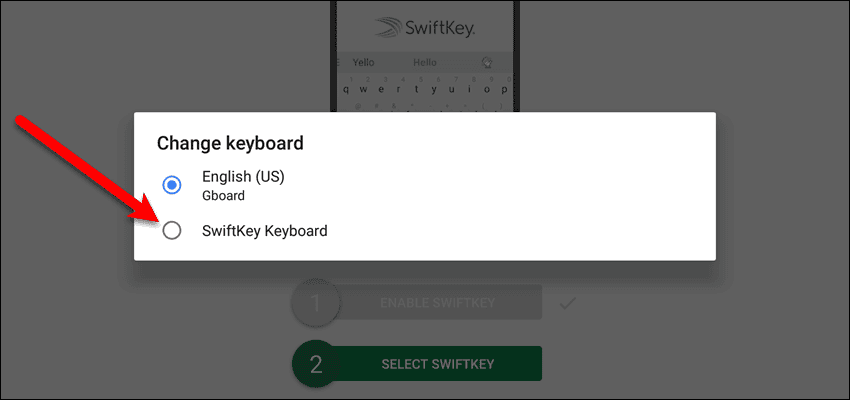
In the SwiftKey app, tap “Select SwiftKey“.
Tap “SwiftKey Keyboard” on the “Change keyboard” dialog box.
Sign In To SwiftKey
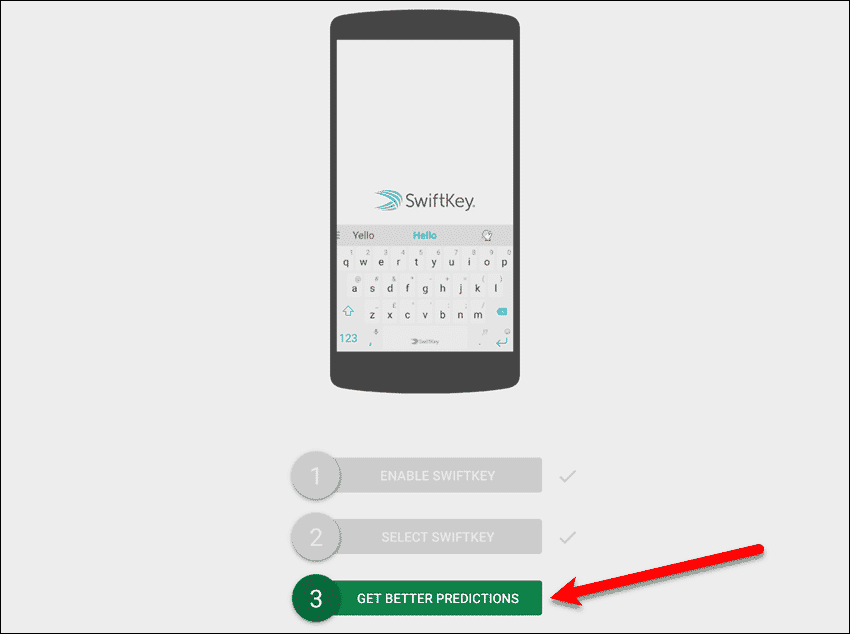
Signing in to SwiftKey allows you to access additional features, such as getting better word suggestions (predictions) and syncing your settings among devices. To sign in to SwiftKey, tap “Get Better Predictions“.
You need to use your Google account to sign in to SwiftKey. Tap “Sign in“.
All the Gmail accounts you are signed into on your device display on the “Choose an account” dialog box. If you don’t see the account you want to use, tap “Add account” and follow the instructions to add a different account. If the account you want to use is listed, tap on the option button for that account and then tap “OK“.
Allow SwiftKey To View Your Google Basic Profile Info
On the next dialog box, tap “Allow” to give SwiftKey Keyboard permission to view your basic Gmail profile info. You’ll be asked to allow SwiftKey to learn your typing style by using all your sent messages from Gmail. If you want to do that, you can tap “Personalize” on the next dialog box that displays and follow the on-screen instructions to allow SwiftKey to access your sent Gmail messages. Otherwise, tap “Later” on that dialog box.
Customize The SwiftKey Keyboard
Now, you can add languages to the SwiftKey Keyboard, change the look of the keyboard with themes, resize the keyboard, and add a number row to the keyboard. The keyboard displays with the selected options, allowing you to try it out. To go back to the default keyboard, or any other keyboard you’ve added to your device, go to “Settings” > “Languages & input” > “Virtual keyboard“. Then, tap the keyboard in the list, or tap “Manage keyboards” to enable another keyboard.
Add The SwiftKey Keyboard To Your iOS Device
To add the SwiftKey Keyboard to your iPhone or iPad, install the app from the App Store and then open it. Then, tap “Get started“.
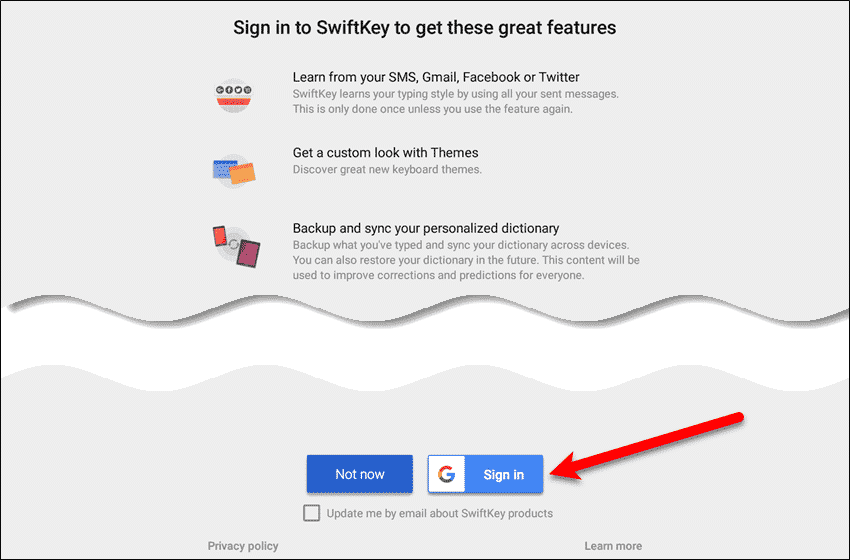
Sign In To SwiftKey
On the “Sign in to SwiftKey” screen, tap either “Continue with Facebook” or “Continue with Google“. Then, follow the on-screen instructions to sign in to SwiftKey using that account.
Once you’ve signed in using Facebook or Google, a screen displays telling you how to enable SwiftKey.
Access The Keyboards In The Settings App
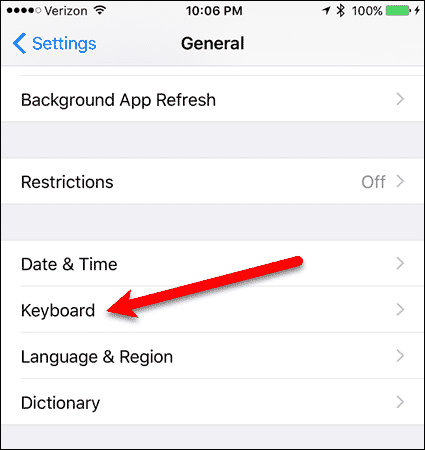
Open the “Settings” app on your iOS device and then tap “General“.
On the “General” screen, tap “Keyboard“.
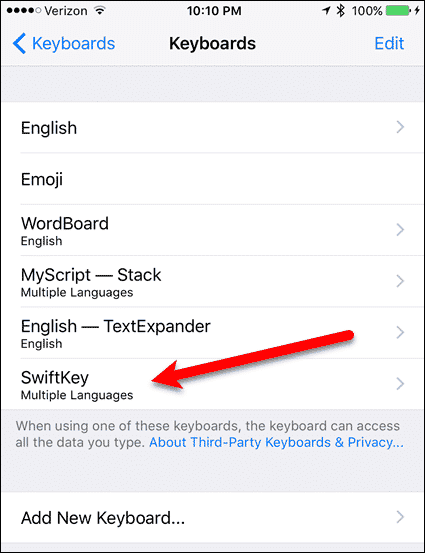
Tap “Keyboards” at the top of the “Keyboards” screen.
Add SwiftKey As a New Keyboard
Below the list of keyboards, tap “Add New Keyboard“.
On the “Add New Keyboard” screen, tap “SwiftKey” in the list of “Third-Party Keyboards“. If you don’t see “SwiftKey” on the list of keyboards, double-press the Home button and close the “Settings” app. Then, reopen the “Settings” app and follow the steps to access the “Add New Keyboard” screen. You should see “SwiftKey” in the list now.
Give SwiftKey Full Access
You need to give SwiftKey full access to use all the features like predictions, settings, themes, languages, and your SwiftKey Account. On the “Keyboards” screen, tap “SwiftKey” in the list.
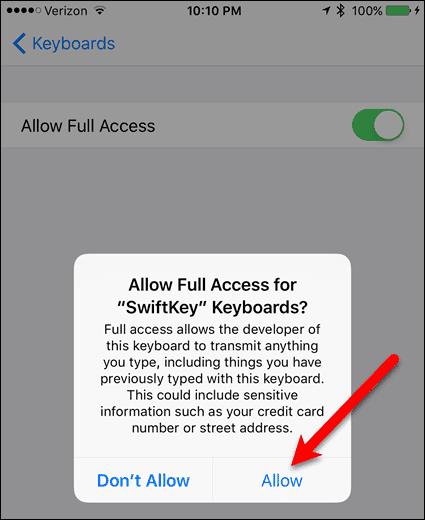
Then, tap the “Allow Full Access” slider button.
Tap “Allow” on the dialog box that displays.
Change To The SwiftKey Keyboard
A screen displays showing you how to change keyboards. On the that displays on this screen, tap the globe icon and select “SwiftKey” from the pop-up list.
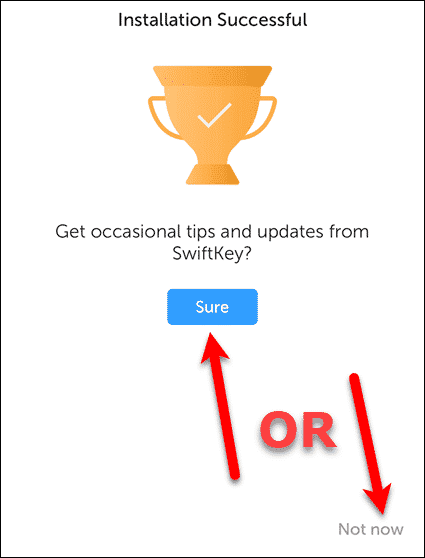
The “Installation Successful” screen displays. If you want to receive tips and updates from SwiftKey, tap “Sure“. If not, tap “Not now” at the bottom of the screen.
Customize The SwiftKey Keyboard
Now, you can customize the SwiftKey Keyboard. Add languages to the keyboard, change the design of the keyboard with themes, change settings, and access support. You can also change your account settings and view your usage stats.
Switch From The SwiftKey Keyboard To Another Keyboard
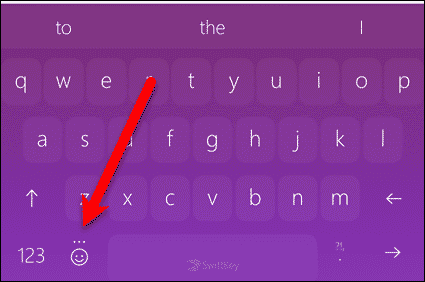
To switch to the next keyboard, tap and hold on the emoji icon on the SwiftKey Keyboard. Then, select “Next keyboard” from the pop-up menu. To switch back to the SwiftKey Keyboard, tap and hold on the globe icon on the keyboard and select “SwiftKey” from the pop-up menu.
How have you customized SwiftKey? Which other third-party keyboards do you use on Android or iOS? Let us know in the comments. Δ Contact Us :- trendblog.guest@gmail.com