Although, sometimes, the Windows shows that the system is connected to the internet but it doesn’t work at all. Trying to fix this issue automatically doesn’t work at all and it stays as it is. So, in this guide, we will be trying to fix this issue.
Reason Behind the Problem “Losing Internet Connection after Installing Windows 10”:
One of the common causes of this problem is the missing or corruption of Windows Socket API (winsock) inside Windows registry. Sometimes, a registry key related to winsock might get corrupted due to some viruses. So, it causes the internet to shutdown. TCP/IP configuration can also be the main culprits behind this issue. Another thing which can be involved in creating this problem might be network card drivers corrupted or not installed properly.
Solutions to Fix the Problem “Losing Internet Connection after Installing Windows 10”:
There are multiple causes behind this problem, so, there might be multiple solutions to fix it. Follow these methods to get your internet back to work on Windows 10.
Method # 1: Resetting Winsock and TCP/IP
Resetting Windows Socket API can do the trick in a majority of cases. You would also be required to reset IPv4 and IPv6 protocol to get your internet back. To do all of this hefty stuff, follow the steps below.
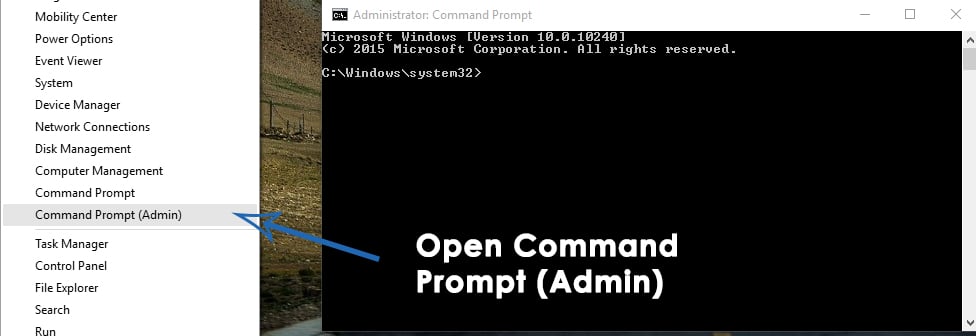
Open the Command Prompt (Admin) by right clicking over the start menu and selecting it from the list. You can also use Win + X keys on the keyboard and select it from the list.
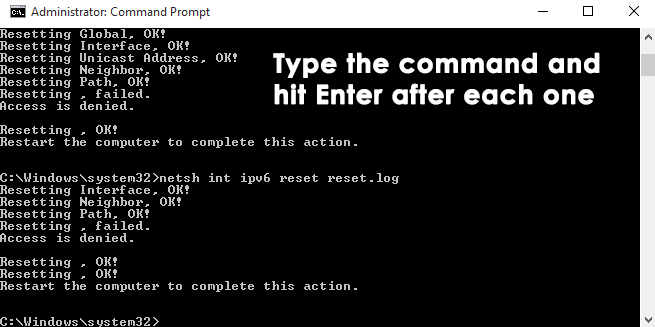
Type the following commands inside the Command Prompt and hit Enter key after typing each one. You can also copy/paste the commands by right clicking inside the command prompt and selecting the Paste Commands: netsh winsock reset catalog netsh int ipv4 reset reset.log netsh int ipv6 reset reset.log Reminder: Press Enter after typing each line.
After the process is done, reboot your computer and check your internet connection whether it is back to work or not.
Method # 2: Updating Network Adapter Drivers
Sometimes, after the installation of Windows, compatible drivers are not installed by Windows because of lack of support for that particular adapter. So, downloading and updating your adapter drivers from manufacturer’s website manually can solve the problem.
Download the latest drivers from manufacturer’s website.
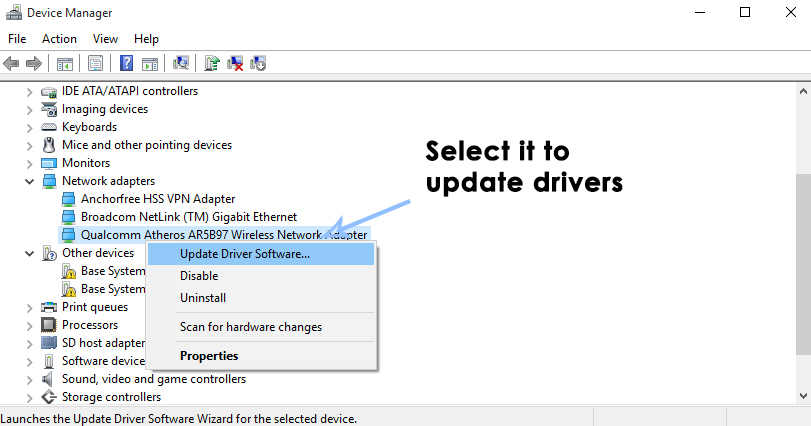
After the drivers are downloaded, navigate to your Device Manager > Network adapters and right click on the one you are using for your internet connectivity. Select Update Driver Software from the top.
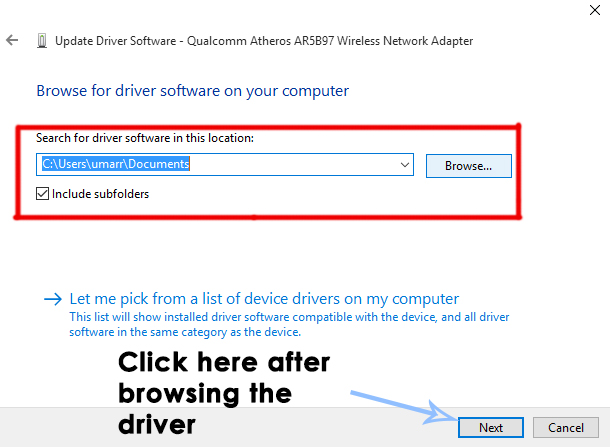
Inside the update window, click on Browse my computer for driver software and browse the appropriate driver you downloaded from the hard drive and hit Next button at the end. After the process is done, reboot your PC and check for problem.
Method #3: Uninstall App
It is possible that a third-party application might be preventing you from being able to connect properly. Therefore, it is recommended that you uninstall the Intel PROSet/wireless Software application if it has been installed on your computer.
Ash Loses Acog in Rainbow Six Siege’s Upcoming Patch, Major Balance Changes…Apple’s M2 Tested On a Linux System, Loses to its Intel and AMD CounterpartsNVIDIA’s RTX 4080 12GB Loses Out to The RTX 3090 Ti in Official BenchmarksBEST GUIDE: Synaptics TouchPad Loses Settings After Reboot