Microsoft releases Windows updates to prevent viruses and malware from the computer by implementing new security features in the form of services. WaasMedicSvc is one such service that runs in the background to deliver error-free updates. However, some users think it is malware as it consumes an excessive amount of CPU and Memory resources. However, that is not true as it is an executable file of the Windows update component.
How To Fix WaaSMedic Agent.Exe Causing High CPU Usage?
This issue often occurs when Windows is trying to install news updates, but for some reason, it frequently fails, and due to that, Windows Update Medic Service causes high CPU usage. Many reasons can cause Windows updates to not install successfully, such as system file corruption, connection issues, and corrupted software distribution folder. These are the common causes, you can read the following ones to get understand in more detail:
Corrupt System Files- Usually, high CPU or Memory usage can be caused by corrupted system files. It’s not just about the corrupted system files, you might even encounter this issue when you have a corrupted third-party application file running in the background. Hence, you will need to repair the corrupt system file to fix this issue.Corrupted Software Distribution Folder- The software distribution folder stores the Windows update files that are downloaded by the Windows update. If these files are corrupted, you will not be able to install the Windows updates, and due to that reason, the Windows Update Medic Service file will run and cause high CPU or Memory usage until you fix this issue.Unstable Internet Connection- To counter this issue, you have to determine what prevents you from downloading and installing the Windows updates. If Windows updates are not downloading and installing due to a lack of internet speed, you have to wait till the internet speed gets stable.
1. Check For Windows Update
As a first method, we recommend trying to update your Windows version. Once you install the Windows updates successfully, Windows Update Medic Service will stop running in the background, which will solve the WaaSMedic Agent.Exe causing high CPU or Memory Usage. Follow the steps:
2. Boot Windows in Safe Mode
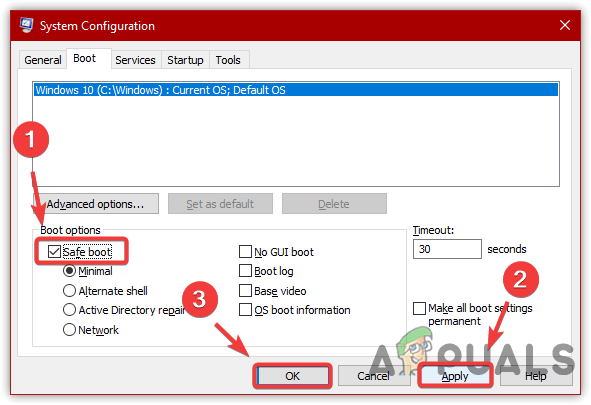
If the Windows updates did not install after so many tries, boot your Windows in safe mode to disable all the services related to Windows updates. The advantage of enabling the safe mode is you won’t need to disable the Windows update service. Below are the steps to boot your Windows in a safe mode:
2.1 Clear Software Distribution Folder
After enabling the safe mode, you will have to clear the software distribution folder to remove all the update files that are downloaded by Windows. Software distribution is a folder located in the Windows directory that contains the files that Windows requires while updating. So it is important to remove the files as they can get corrupted and causes various issues. Follow the below steps:
3. Disable WaaSMedic Agent Exe Via Registry
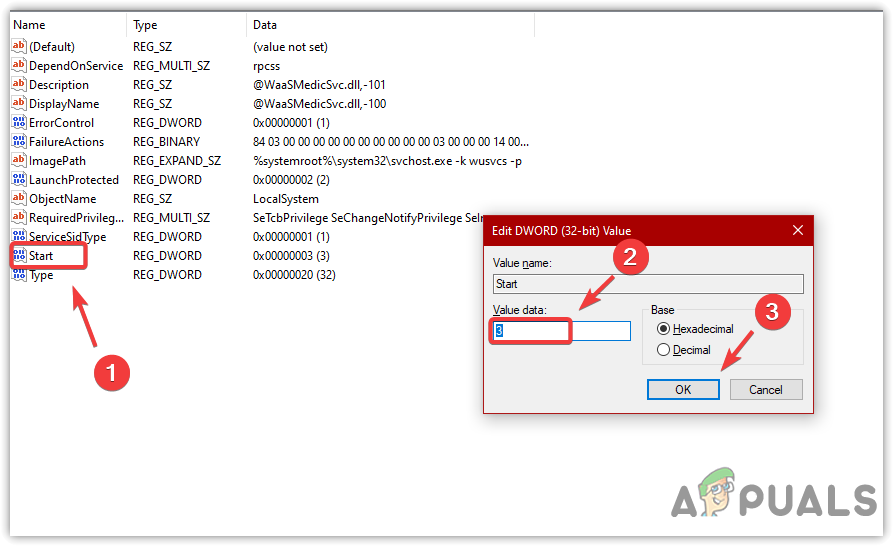
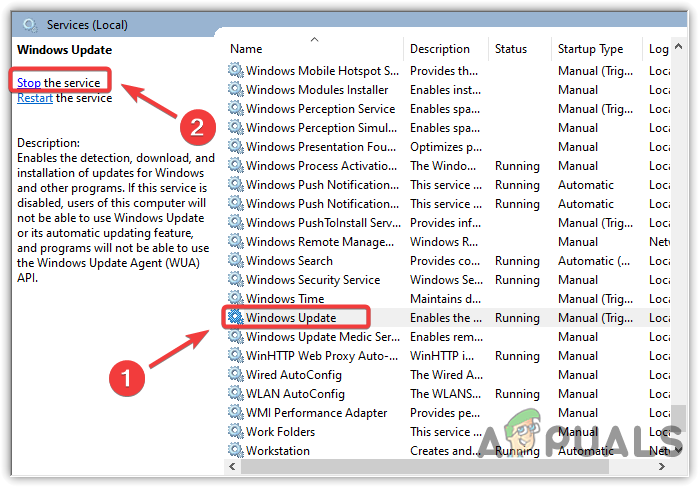
If the issue persists, try disabling the WaaSMedic service via the registry editor. Even though Windows does not allow its users to disable the WaaSMedic service from the services Window, so we have to disable WaaSMedic by using the registry editor. Before making changes to the registry editor, we recommend creating a full registry backup. To disable WaasMedicAgent.exe, follow the steps:
4. Run DISM / SFC Commands
DISM, or Deployment Image Servicing and Management, is an inbuilt utility that includes three commands for repairing, scanning, and restoring system files. In comparison, the SFC or System File Checker is only a single command used to repair the system files such as DLL, exe, and others. Follow the steps to execute DISM or SFC commands:
5. Try Install the Windows update Manually
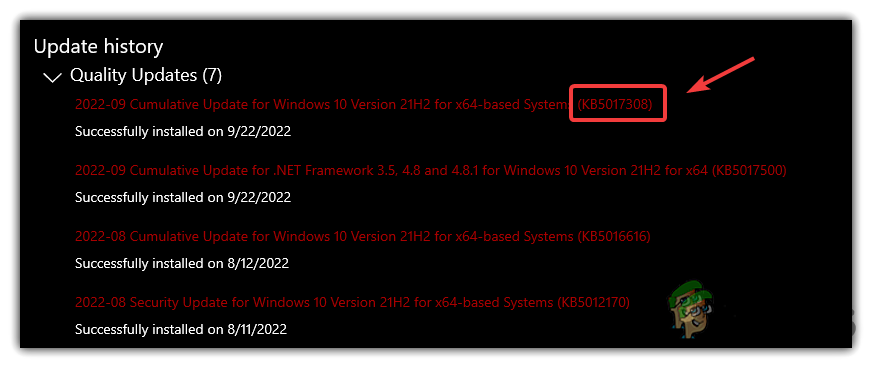
The final method for this solution is to install the Windows update manually via the Microsoft Catalog. If your Windows is not installing the updates after multiple tries, it is possible that either the files are corrupted or there is some problem with your Windows. Rather than determine the source of the problem, download the Windows update from the Microsoft catalog, a website that contains all the Windows updates released so far. Before downloading the Windows update, first, you need to clear the software distribution folder. Below are the instructions you can follow to install the Windows update manually: In case none of the methods fixed your issue, try resetting or restoring Windows to a previous state by following the steps composed in the articles.
How to Fix High CPU and Disk Usage by wmpnetwk.exe in Windows 7Fix: WMI Provider Host (WmiPrvSE.exe) High CPU Usage On Windows 10Fix: High CPU or Disk Usage by Ntoskrnl.exe on Windows 10How to Fix High CPU Usage by GfxUI.exe on Windows 10