What is Wsappx?
Wsappx is a process that was introduced in Windows 8 and can be found in the later versions like Windows 10. This process runs in the background and it is related to the Windows Store and Windows Universal Apps. The services running under this process are also related to Windows Store and/or Windows Universal App platform. These services are used to either update a Windows app or for license checking purposes.
Should I be worried about Wsappx?
No, not at all. As mentioned above, it is a Windows own process that can be found in Windows 8 and Windows 10. As of right now, there aren’t any viruses or malware associated with this name. So, if you see this process running while looking at the process list in Task Manager, do not worry about it. It is a legitimate Microsoft’s process and it is found on every Windows 8 and 10 running computer.
What causes the high CPU usage of wsappx?
There are a lot of users who have complained about wsappx’s high CPU usage. As mentioned in the first paragraph, its CPU usage might increase or decrease on its own. But you will, at some point, see a high CPU usage by this process. Since this process is related to the Windows Store and/or Windows Universal App platform, the high CPU usage you’ll see will be the result of this process either installing or updating one of the Windows app. Whenever you’ll see a high CPU usage, one of your apps must be getting updated. And, you won’t always see it at high CPU usage because this process initiates on its own whenever an app needs updating or installation. You’ll notice that you won’t be able to disable this process from the Windows Services. If you try to do so, you might see a message telling you about it affecting other apps. Similarly, you might see the same message (or a variation of it) if you try to End Task the process from the Task Manager. However, there are some ways of disabling this process. If you are one of those users who don’t use Windows Apps a lot or you simply want to get rid of the process because of its high CPU usage, there are a couple of things that you can try. These methods are given below. Start from method 1 and keep trying the methods until you solve the high CPU usage issue.
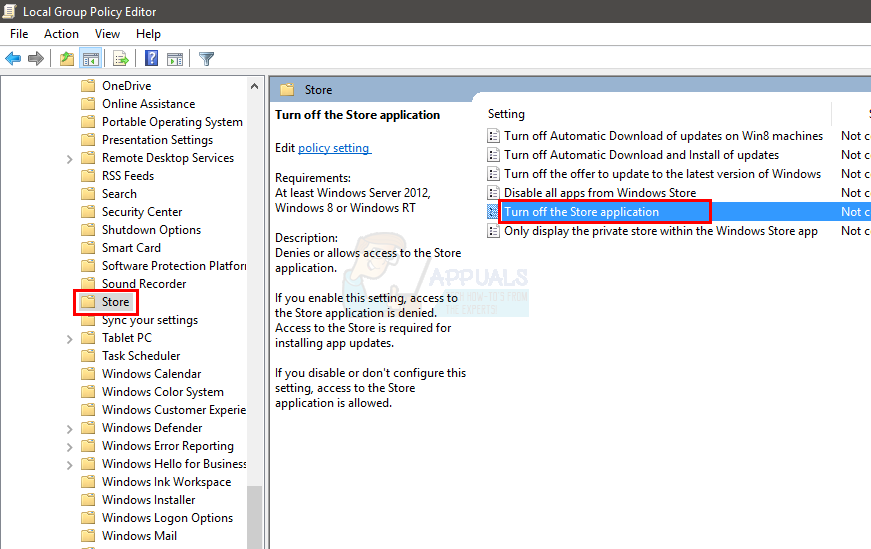
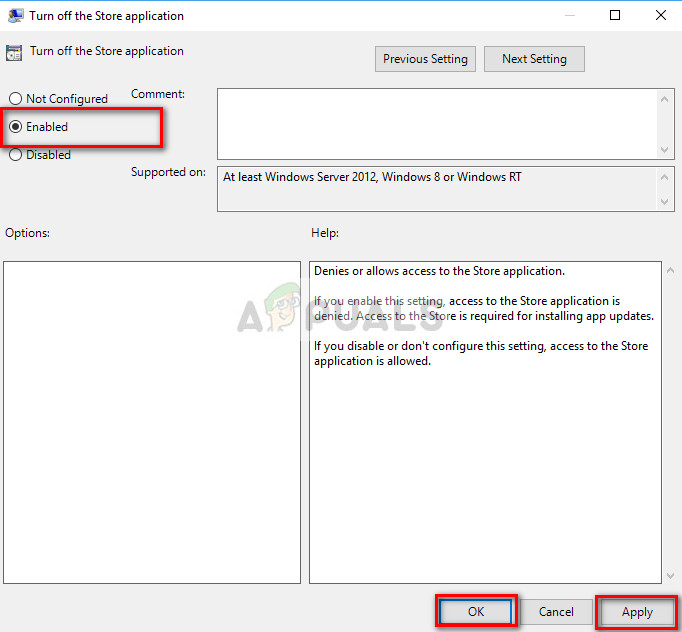
Method 1: Disable Windows Store
Note: This method won’t stop wsappx from running in the background. You will still be able to see the wsappx process in the Task Manager. However, wsappx won’t cause high CPU usage once the Windows Store is disabled. Since the process is related to the Windows Store and wsappx uses the resources to update or perform other tasks related to the Windows Store Apps, disabling the Windows Store will stop wsappx from using so many resources. The problem here is that you can’t just simply disable the Windows Store from services, like you would normally do with other services. So, we will have to use the Local Group Policy Editor. Here are the steps for disabling Windows Store via Local Group Policy Editor
Windows 10
Reboot your pc and you should be good to go.
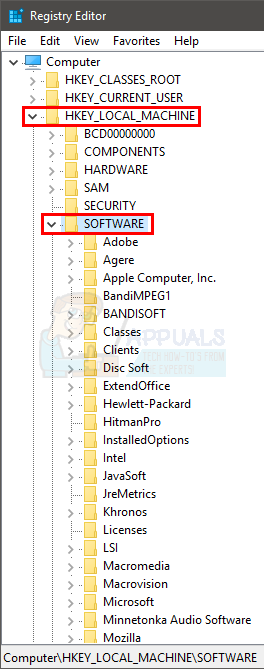
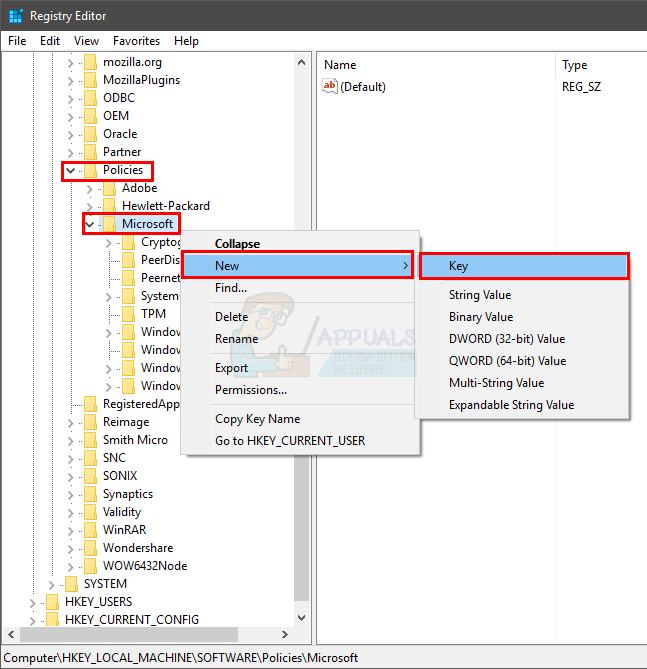
Windows 8 and 8.1
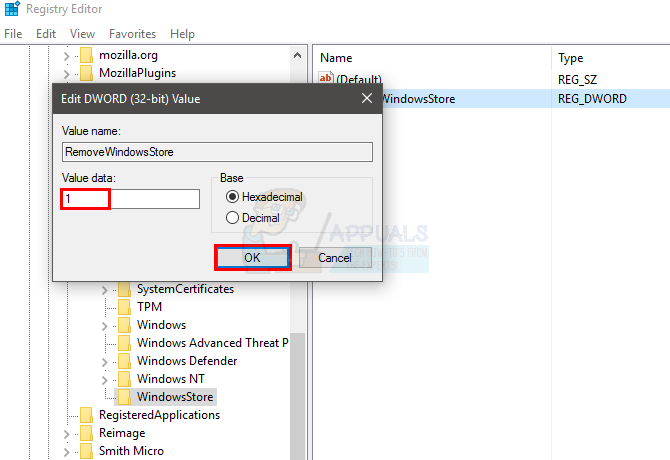
The Local Group Policy Editor isn’t available in Enterprise and Professional Editions. So, if you are using an Enterprise or Professional Edition then you will have to do this from the registry. Here are the steps for Disabling Windows Store via Registry.
That’s it. This should disable the Windows Store in Windows 8 and 8.1.
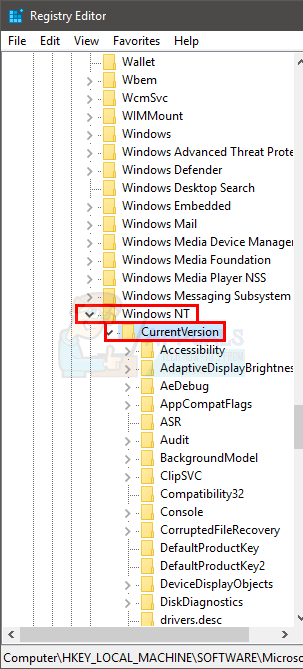
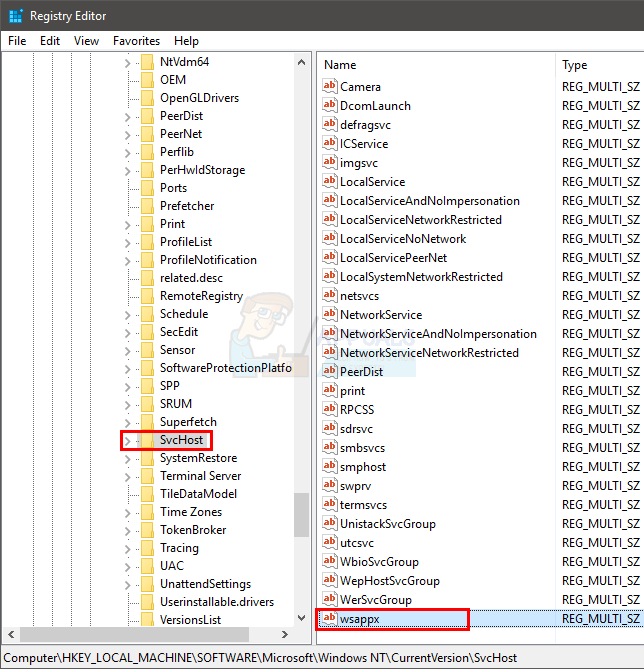
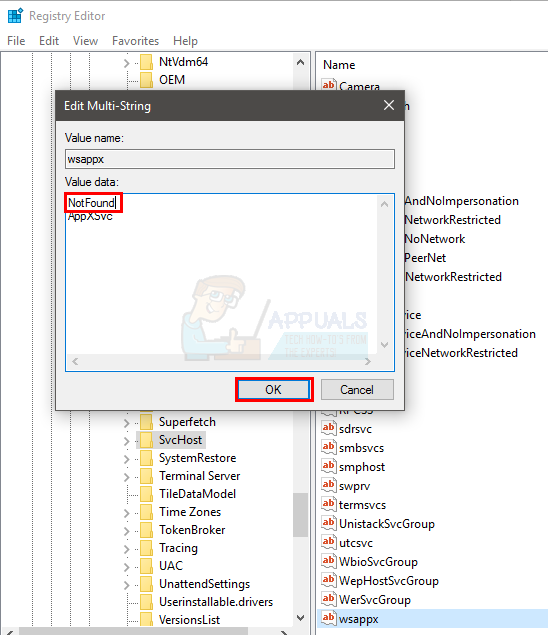
Method 2: Use Registry Editor
You can use the registry editor to change some strings which will solve this issue.
That’s it. This should solve the high CPU usage issue for you.
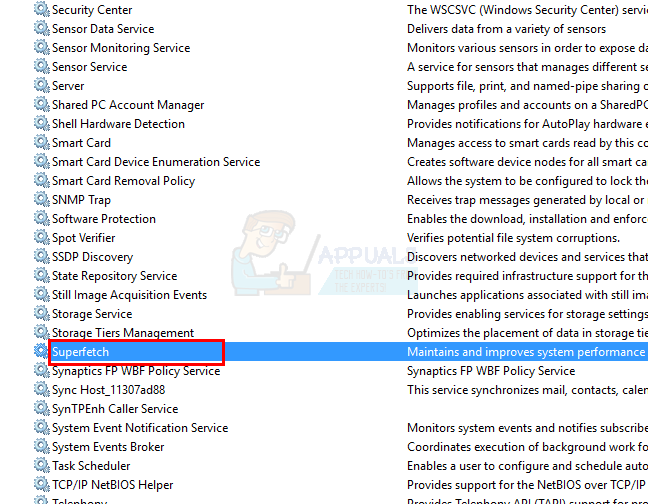
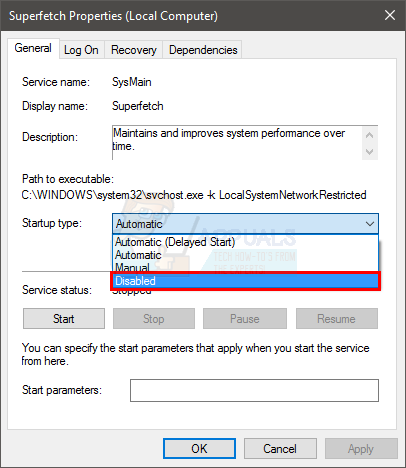
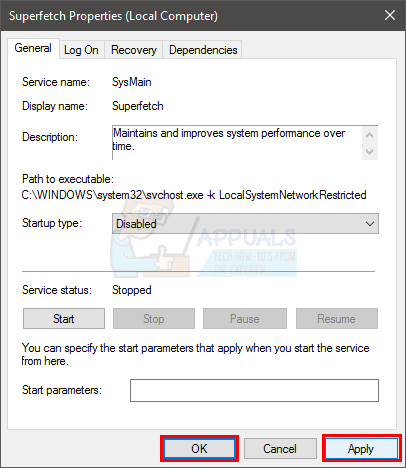
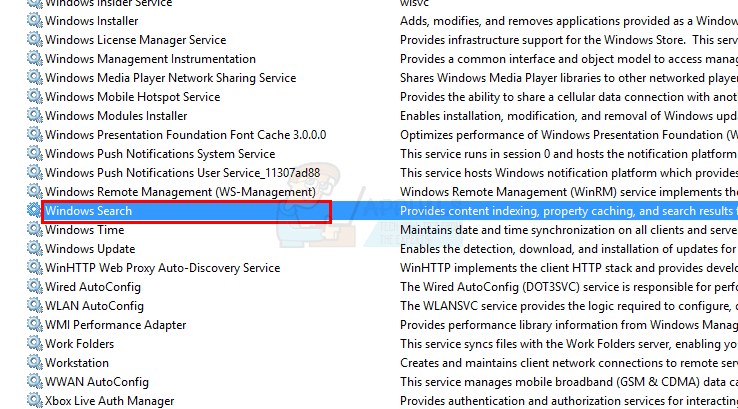
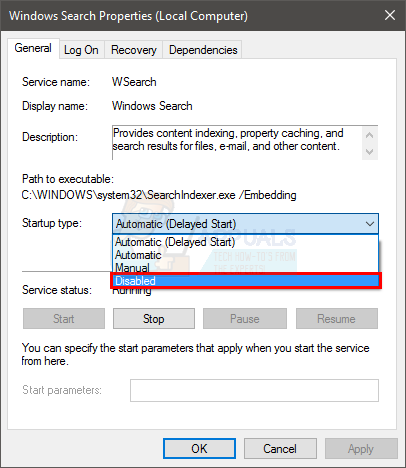
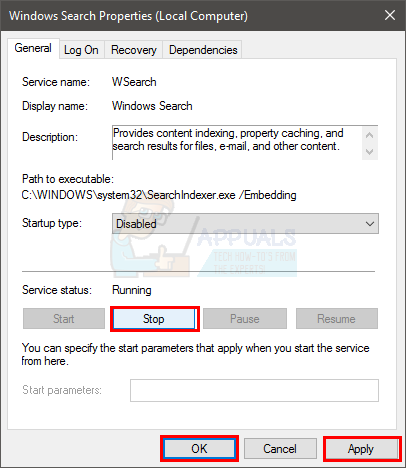
Method 3: Disable Superfetch and Windows Search
If the above 2 methods didn’t work then try disabling the Superfetch and Windows Search services. Disabling these services have known to work for a minority of the users. So, it is worth a try.
That’s it. Once done check if the problem is resolved or not.
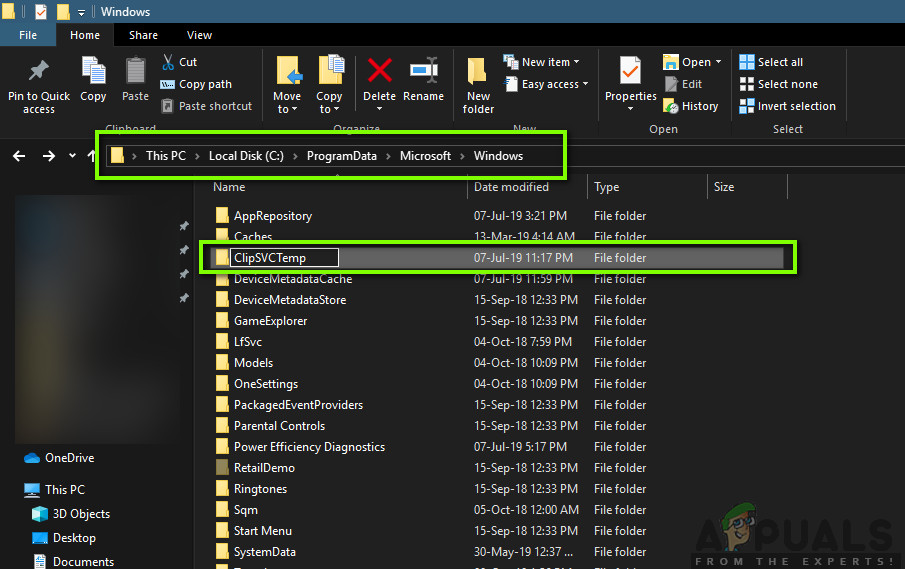
Method 4: Reinitializing Store License Database
If all the above methods don’t work out, we can try reinitializing the Windows Store License Database. Do note that using this method, you might get some of Windows Store applications uninstalled but once the issue is resolved, you can easily reinstall them within minutes. Here, we will first start in Safe mode so Windows Store service gets paused and then will rename a specific directory. Then we will start back in normal mode and hopefully, the issue will be resolved. Now, rename the folder to something like ‘ClipSVCTemp’. Save changes and exit.
How to Fix High CPU and Memory Usage By csrss.exeFix: dasHost.exe High CPU and Memory UsageFix: High CPU and Memory Usage by MRT.exeFix: High CPU & Memory Usage by ‘Inputpersonalization.exe’